PCPlanet – Tech Blogs | Information
  • Home
  • Tools
    • CHMOD Calculator
    • Subnet Calculator
  • Linux Guides & Tutorials
    • Beginner Guides
    • Linux Installation Tutorials
    • Command Line Tutorials
    • Server Administration Guides
    • Security Tutorials
    • Database Tutorials
    • Open-Source Software
      • Nextcloud Guides
      • Apache
    • Operating Systems
      • Ubuntu
      • RHEL/Rocky/Alma
  • Ransomware News
  • Cybersecurity Laws and Regulations
Top Posts
How to install Emby Server on Ubuntu
Best Linux distribution (distros) in 2022
15,000 WordPress Sites hacked with Malicious Redirects
How to Install Python 3.9 on Ubuntu 18.04
How to Install Python 3.9 on Ubuntu 16.04
How to Install MongoDB on Ubuntu 16.04 to...
How to enable HSTS on Apache
How to install Python on CentOS 8
How to install PHP 8.1 on RHEL based...
Comment activer HSTS pour Apache
Navigating CVE-2023-49103: Proactive Defense for ownCloud
Monday, July 7, 2025
PCPlanet – Tech Blogs | Information
  • Home
  • Tools
    • CHMOD Calculator
    • Subnet Calculator
  • Linux Guides & Tutorials
    • Beginner Guides
    • Linux Installation Tutorials
    • Command Line Tutorials
    • Server Administration Guides
    • Security Tutorials
    • Database Tutorials
    • Open-Source Software
      • Nextcloud Guides
      • Apache
    • Operating Systems
      • Ubuntu
      • RHEL/Rocky/Alma
  • Ransomware News
  • Cybersecurity Laws and Regulations
Copyright 2021 - All Right Reserved
LinuxUbuntu

How to Install MongoDB on Ubuntu 16.04 to 22.04

by pcplanet August 12, 2022
written by pcplanet 2 minutes read

This tutorial will show you how to install MongoDB on Ubuntu 16.04 to 22.04 LTS.

The modern web is littered with apps that rely on MongoDB, a document database. The fact that it does not use the more common table-based relational database structure is what gives rise to its classification as a NoSQL database.

Since it employs JSON-like documents with dynamic schemas, adding data to a MongoDB database does not necessitate creating a schema in advance, as is the case with relational databases. Anytime you need to make a change to the schema, you may do it without having to create a whole new database.

Prerequisites

sudo apt install dirmngr gnupg apt-transport-https ca-certificates software-properties-common

Install Libssl1 to avoid the error E: Unable to correct problems, you have held broken packages. Add its repository to your system using the command below.

echo "deb http://security.ubuntu.com/ubuntu impish-security main" | sudo tee /etc/apt/sources.list.d/impish-security.list

Update your system to apply changes.

sudo apt update

Then install Libssl1 using the following command.

sudo apt install libssl1.1

To Install MongoDB on Ubuntu 22.04, start by adding MongoDB APT repo signing key using the following command.

wget -qO - https://www.mongodb.org/static/pgp/server-5.0.asc | sudo apt-key add -

Install the MongoDB APT Repo after that using the command below.

echo "deb [ arch=amd64,arm64 ] https://repo.mongodb.org/apt/ubuntu focal/mongodb-org/5.0 multiverse" | sudo tee /etc/apt/sources.list.d/mongodb-org-5.0.list

Next update changes in your system.

sudo apt update

Install MongoDB on Ubuntu

Install the latest version of MongoDB on Ubuntu by running the command below.

sudo apt install -y mongodb-org

In case you want MongoDB to run automatically on boot run the following command.

sudo systemctl enable mongod

Start MongoDB by running the following command.

sudo systemctl start mongod

In case MongoDB doesn’t start run the command below to reload.

sudo systemctl daemon-reload

Confirm if MongoDB is running.

sudo systemctl status mongod

Sample output

● mongod.service - MongoDB Database Server
     Loaded: loaded (/lib/systemd/system/mongod.service; disabled; vendor preset: enabled)
     Active: active (running) since Tue 2022-02-27 23:24:25 UTC; 2min 8s ago
       Docs: https://docs.mongodb.org/manual
   Main PID: 6618 (mongod)
     Memory: 60.4M
     CGroup: /system.slice/mongod.service
             └─6618 /usr/bin/mongod --config /etc/mongod.conf
lines 1-10/10 (END)

To stop MongoDB run the command below.

sudo systemctl stop mongod

To connect to the MongoDB shell simply type.

mongosh

Uninstall MongoDB on Ubuntu

You can completely remove MongoDB on your system using the following steps.

Start by stopping MongoDB process using the command below.

sudo systemctl stop mongod

Then remove any previously installed MongoDB packages.

sudo apt remove --purge --auto-remove mongodb-org*

Next run the following command to remove MongoDB databases.

sudo rm -r /var/log/mongodb
sudo rm -r /var/lib/mongodb
August 12, 2022 0 comments
2 FacebookTwitterPinterestEmail
LinuxNews

7 reasons why Linux is a good choice

by pcplanet August 10, 2022
written by pcplanet 3 minutes read

Linux is a free and open source software created in 1991. It has quickly become one of the most used operating systems in the world. Linux is a lot like Windows, macOS or Android, but it is free and open source software. Open source means that anyone can access the application’s code, modify it and share it with other people. This enables people to get involved in the software’s development and make their own version of it. Linux is available for everyone and everywhere, from your computer to your smartphone. This article explains why

1. Stable and secure

One of the primary reasons people prefer Linux is that it is stable and safe. People and organizations all throughout the world, from colleges to banks, use Linux. This implies that there is always someone available to address any bugs or security issues. Linux is far more secure than either Windows or macOS.

There are no necessary updates.

Linux does not have mandatory upgrades. You must manually install updates if you are running a 64-bit version of Linux. You can select when and if you wish to download and install them. You can even turn off automatic updates if you don’t want them to be installed. On Windows, you are compelled to install updates as soon as possible.

2. Easy to use for beginners

Linux is far more user-friendly than Windows or macOS, especially for newcomers. Linux includes all of the essential functions that most users require. Linux is highly customizable, which means you can make it appear and perform precisely how you want. It makes no difference if you want to use Linux on your desktop computer or your smartphone; it will work flawlessly on both.

Viruses and malware do not pose a threat bigger than those on windows.

One of the primary reasons why people don’t use Linux is that they believe it can be infected with viruses or malware easily.

3. A lot of free software

When it comes to free software, Linux is one of the best operating systems. On Linux, you can use a wide range of free and open source software. There are also applications that are comparable to those found on Windows or macOS but are absolutely free. You do not need to spend money on software that is available for free.

System resources are not being utilized as much.

One of the advantages of Linux is that it does not consume as much system resources as Windows or macOS. This means that if you install Linux on your computer, it will run more faster and perform much better. Because the system resources are only needed for the programs that you are running, the unused areas of the system

4. Does not steal your data

By using a Linux operating system, you won’t have to worry about your personal data being stolen. This is because there are no viruses, malware or Trojans that can steal your personal information. Linux will not get hacked, because it does not have any backdoors that can be used by hackers.

5. Possibility to customize

You can personalize your Linux operating system in a variety of ways. You can, for example, change the appearance of your desktop, add more functionality to it, and make it more comfortable for yourself. If you want to know how to update your Linux operating system, read our article on the subject.

6. No advertisements

You have to deal with a lot of advertising in Windows and macOS. If you download a game on Windows or macOS, for example, you will be served adverts linked to that game. These types of adverts, which improve the user experience, do not exist on Linux.

7. Can be used on all devices

Linux can be used not only on computers, but also on mobile devices, smart TVs, and other gadgets. If you like, you can even utilize it on your video gaming console. It is compatible with a wide range of devices, including your Android smartphone or tablet, Raspberry Pi, Chromecast, and others.

August 10, 2022 0 comments
1 FacebookTwitterPinterestEmail
NewsWindows

Windows 11 22H2 is coming

by pcplanet August 8, 2022
written by pcplanet 4 mins read

This fall, Windows 10 22H2 will also be released.

You can download Windows 11 ISO here.

At-a-glance

Microsoft is scheduled to launch the following new features in Windows 11 22H2:

  • New Start menu folders for organizing apps.
  • In the Start menu, there is a new option to alter the number of pins.
  • The ability to drag and drop files and programs from the taskbar.
  • Overflow menu to hide programs that don’t fit.
  • Drag-and-drop Snap layouts.
  • Modernized Task Manager.
  • New Live captioning function improves understanding of spoken information.
  • New voice-control feature.
  • New tablet gestures.
  • Smart App Control (SAC) blocks harmful apps.
  • Visually updated legacy interface.
  • Focus now integrates focus sessions.
  • File Explorer tabs and navigation pane updated.
  • Quick Settings now provide Bluetooth controls.
  • Automatic printer detection added to Print Queue and Print dialog.
  • Better power control reduces energy consumption.
  • Settings app update uninstall.

Here’s a more in-depth look at some of the new features coming with version 22H2.

Windows Shell

Windows 11 22H2 focuses on the Windows Shell. Microsoft continues to modernize the user interface by replacing obsolete designs with Windows 11’s. Version 22H2 redesigns the volume and brightness interfaces when using hardware buttons. Do Not Disturb (formerly Focus Assist) is now in Notification Center.
Microsoft has restored many Start menu features from Windows 10, including the ability to create app folders and resize pinned apps. Users can now pin an additional row of apps or reduce it to two rows for a bigger “Recommended” section.

The Taskbar now supports drag-and-drop, allowing you to put files onto application icons. This has been a Taskbar function for years, but Windows 11 didn’t include it. 22H2 is a welcome return.

“Suggested Actions” provides options when you copy a date or phone number. You can simply create a calendar event or add a phone number using these options.

Moving an app window will reveal a new snapping layouts menu. This is an alternative to the drop-down menu that shows when hovering over an app’s maximize button.

Microsoft makes a number of changes for tablet users to enhance the touch-first experience in Windows 11. Simple access to Windows Shell functionality is now possible with new touch gestures. To access the Start menu, slide up from the bottom of the screen; to access Quick Settings, swipe to the right.

Applications may be minimized with three fingers down while they can be switched between with left and right swipes. When finished, these smooth animations stick to your finger, improving responsiveness.

Settings

Microsoft included numerous new options sections to the Settings app with 22H2. New Microsoft Account page in Accounts provides an overview of your Microsoft 365 membership and easy access to online settings and services. A redesigned Family Safety page provides rapid access to all the service’s features.

Windows Update now syncs with your local grid to save emissions. Windows Update will try to schedule downloads and installs to use as much renewable energy as feasible.

Other new settings include the ability to set the Bing daily picture as a desktop wallpaper, disable the System Tray overflow menu, and more.

Apps

In 22H2, Microsoft made the programs and experiences in the box better. A tabbed interface has been added to the top of File Explorer. Multiple File Explorer folders can now be opened in a single window, like a web browser, to help you keep your desktop neat.

Shortcuts to user folders and OneDrive are better organized with the help of a new sidebar navigation UI. Microsoft’s nearby share function shows not only Bluetooth devices but also private network devices. With the file sharing UI, you can send files from your computer to OneDrive.

File Explorer now has a “pinned files” part in the Quick Access panel. Users can pin files here so they can get to them later. Now that OneDrive is part of the File Explorer, there is a new drop-down menu that shows how much online storage you are using.

The new Task Manager interface looks more like Windows 11. When you shrink the window, the sidebar navigation falls down. Sound Recorder is getting new output options, a way to see what the sound looks like, and a new way to use it.

Clipchamp and Family Safety are both part of version 22H2. Family Safety is an online app that gives you a quick look at your whole family, including where your kids are, what’s coming up, and other home resources. This service is great for Windows and Xbox PCs, as well as Android phones with the Microsoft Launcher and Family Safety software installed.

Clipchamp is a new web-based video editor that will come with Windows 11. For more effects and rendering options, you can pay a monthly fee..

August 8, 2022 0 comments
0 FacebookTwitterPinterestEmail
CommandsLinux

How to use the ifconfig command – The Basics

by pcplanet August 6, 2022
written by pcplanet 4 mins read

The network administration tool ifconfig (interface configuration) Is used in Linux systems to setup and monitor network interfaces. You may use ifconfig to assign IP addresses, activate or disable interfaces, control ARP cache, routes, and other things.

We’ll look at how to utilise the ifconfig command in this tutorial.

How to Setup ifconfig

The command has been deprecated and superseded by ip, thus it may not be present in recent Linux editions.

If you see an error message that says “ifconfig: command not found,” it signifies that the package containing the command is not installed on your system.

Install on Ubuntu/Debian

To install it on Ubuntu and Debian-based Linux systems, use the following command:

sudo apt install net-tools -y

Install on Centos

To install it on CentOS and other RHEL-based Linux distributions, enter:

sudo dnf install net-tools -y

How to Use the ifconfig Command

The fundamental syntax of the ifconfig command is provided below:

ifconfig [-a] [-v] [-s] <interface> [[<AF>] <address>]

Where:

  • interface – used to identify a network interface
  • address – is the IP address that you want to assign.

The command’s settings are not durable. All modifications are lost after a system restart. You must update the distro-specific configuration files or add the instructions to a startup script to make the changes permanent.

Network interfaces can only be configured by root or users with sudo access.

Display Network Interface Information

Ifconfig shows all network interfaces’ configuration details and associated IP addresses when run without any options:

ifconfig -a

All active and dormant network interfaces are listed in the output:

lo        Link encap:Local Loopback
          inet addr:127.0.0.1  Mask:255.0.0.0
          inet6 addr: ::1/128 Scope:Host
          UP LOOPBACK RUNNING  MTU:65536  Metric:1
          RX packets:4198 errors:0 dropped:0 overruns:0 frame:0
          TX packets:4198 errors:0 dropped:0 overruns:0 carrier:0
          collisions:0 txqueuelen:1
          RX bytes:498729 (498.7 KB)  TX bytes:498729 (498.7 KB)

eth0      Link encap:Ethernet  HWaddr 4c:bb:58:9c:f5:55
          inet addr:10.0.0.25  Bcast:10.0.0.255  Mask:255.255.255.0
          UP BROADCAST RUNNING MULTICAST  MTU:1500  Metric:1
          RX packets:84110 errors:0 dropped:0 overruns:0 frame:0
          TX packets:59727 errors:0 dropped:0 overruns:0 carrier:0
          collisions:0 txqueuelen:1000
          RX bytes:70667629 (70.6 MB)  TX bytes:20886290 (20.8 MB)

After the command, provide the name of the network interface you want to show configuration information for:

ifconfig eth0

This is how the result will appear:

eth0      Link encap:Ethernet  HWaddr 4c:bb:58:9c:f5:55
          inet addr:10.0.0.25  Bcast:10.0.0.255  Mask:255.255.255.0

          UP BROADCAST RUNNING MULTICAST  MTU:1500  Metric:1
          RX packets:84110 errors:0 dropped:0 overruns:0 frame:0
          TX packets:59727 errors:0 dropped:0 overruns:0 carrier:0
          collisions:0 txqueuelen:1000
          RX bytes:70667629 (70.6 MB)  TX bytes:20886290 (20.8 MB)

Give a network interface a Netmask and an IP address.

You may provide a network interface an IP address and a netmask with the ifconfig command.

The IP address and netmask should be assigned using the syntax shown below:

ifconfig [interface-name] [ip-address] netmask [subnet-mask]

For instance, to give the interface eth0 the IP address 10.0.0.25 and the netmask 255.255.0.0, you would execute:

ifconfig eth0 10.0.0.25 netmask 255.255.0.0

Using interface aliasing, you may also provide a network interface a secondary IP address:

ifconfig eth0:0 10.0.0.26 netmask 255.255.0.0

Enable and Disable a Network Interface

Resetting the network interface could be necessary sometimes. In this situation, a network interface may be enabled or disabled using the ifconfig command.

The device name must be accompanied by the down flag in order to shutdown an active network interface:

ifconfig eth0 down

Use the up flag to activate a dormant network interface:

ifconfig eth0 up

Enable and Disable Promiscuous Mode

A network interface can observe and access all packets on a network thanks to promiscuity. The promiscuous feature on a particular network device may be enabled and disabled using the ifconfig command.

Enter the promisc flag after the device name to activate the promiscuous mode on a network interface:

ifconfig eth0 promisc

To disable the promiscuous mode, use the -promisc flag

ifconfig eth0 -promisc

Change MTU of a Network Interface

You may restrict the size of packets that are sent on an interface using the MTU (“Maximum Transmission Unit”) setting.

The following syntax can be used to modify the MTU value:

ifconfig [interface-name] mtu [mtu-value]

Run the command below, for instance, to adjust the MTU value of network interface eth0 to 500.

ifconfig eth0 mtu 500

Change the MAC address of a Network Interface

The physical address that specifically identifies the devices on a network is called MAC, or “Media Access Control.”

Use the hw ether flag to set the new MAC address when changing a network interface’s MAC address:

ifconfig eth0 hw ether 00:00:2d:4a:2a:28

Conclusion

You now know how to use the ifconfig command to set up and show information about a network interface. For more information, see the man page for the ifconfig command.

If you have questions, please leave a comment below.

August 6, 2022 0 comments
1 FacebookTwitterPinterestEmail
CommandsLinux

How to use the CAT command in Linux

by pcplanet August 6, 2022
written by pcplanet 4 minutes read

Using real-world examples, we’ll teach you how to use the cat command in this article.

One of the most used commands in Linux is cat. There’s nothing to worry about when you don’t provide an input file name or one that begins with a single “-” (hyphen).

Most often, cat is used to show the contents of text files, combine files by adding the contents of one file to the end of another, and create new files.

CAT Command Syntax

Starting with the syntax, let’s go over how to use the cat command.

This is the form of the cat’s utility expression:

cat [OPTIONS] [FILE_NAMES]
  • OPTIONS – cat options . Use cat –help to view all available options.
  • FILE_NAMES – Zero or more file names.

Retrieving a File’s Contents

Using the cat command to read a file’s content is the most common and fundamental use of the command.

As an example, using the following command will display the contents of the file /etc/issue on the terminal:

cat /etc/issue

Redirect the content of a file

It is possible to direct the output to a file rather than to stdout.

The (>) operator is used to copy the contents of doc1.txt to doc2.txt.

cat doc1.txt > doc2.txt

Normally, you’d use the cp command to copy a file to your computer.

The command will create doc2.txt if it doesn’t already exist. The file will be overwritten if it isn’t.

Append the contents of doc1.txt to doc2.txt using the (>>) operator:

cat doc1.txt >> doc2.txt

The file will be created if it doesn’t already exist, just like before.

Print the Line Numbers

The cat command can be used to display the contents of a file with line numbers:

cat -n /etc/lsb-release
1	DISTRIB_ID=Ubuntu
2	DISTRIB_RELEASE=20.04
3	DISTRIB_CODENAME=bionic
4	DISTRIB_DESCRIPTION="Ubuntu 20.04.1 LTS"

Eliminate Repeated Blank Lines

Use the -s option to omit empty output lines repeated:

cat -s doc.txt

Display TAB characters

The -T option distinguishes tabs from spaces visually.

cat -T /etc/hosts
127.0.0.1^Ilocalhost
127.0.1.1^Iubuntu1804.localdomain

The TAB characters are rendered as ^I.

Display Line Breaks

Line ending characters can be displayed with the -e argument:

cat -e /etc/lsb-release
DISTRIB_ID=Ubuntu$
DISTRIB_RELEASE=20.04$
DISTRIB_CODENAME=bionic$
DISTRIB_DESCRIPTION="Ubuntu 20.04.1 LTS"$

Endings of lines will be shown in the form of “$”.

Putting Files Together

When giving two or more file names as inputs to the cat command, the file contents are concatenated. cat reads and displays file contents in the order specified by its arguments.

For instance, the following command will read doc1.txt and doc2.txt and display the results on the terminal:

cat doc1.txt doc2.txt

You can concatenate many text files into a single file.

Using the (>) operator, the following command will append the contents of doc1.txt and doc2.txt to a new file named combineddoc.txt:

cat doc1.txt doc2.txt > combineddoc.txt

If combineddoc.txt does not already exist, the command will create it. Otherwise, the file will be overwritten.

To use the (>>) operator to concatenate doc1.txt and doc2.txt and add the result to file3.txt:

cat doc1.txt doc2.txt >> file3.txt

The file will be created if it does not already exist.

When cat is used to concatenate files, you can use the same parameters as in the preceding section.

File-Creating

Creating small files using cat is often more convenient than using a text editor like nano, Vim, Sublime Text, or Visual Studio Code..

In order to create a brand-new file, you must first run cat and then specify its name using the redirection operator (>). To save the file, press CRTL+D after you’ve entered the text.

Doc1.txt is being created in the following example.

cat > doc1.txt

If there is a file named doc1.txt, it will be deleted. To append the output to an existing file, use the ‘>>’ operator.

cat >> doc1.txt

Conclusion

The cat command has the ability to show, combine, and create brand new files in your computer.

Let us know if you have any questions or comments.

August 6, 2022 0 comments
0 FacebookTwitterPinterestEmail
Linux

Systemctl Service Listing in Linux

by pcplanet August 2, 2022
written by pcplanet 4 minutes read

A software that operates in the background on Linux is referred to as a service. It is possible to launch services either manually or automatically when the system boots up.

If you use Linux as your primary operating system or development platform, you will need to interact with a range of services such as webserver, ssh, and cron, among others. When troubleshooting system faults, having the ability to validate the status of services and identify the services that are now operational is critical.

The majority of modern Linux distributions use systemd as their primary init system and service manager. This is especially true of more recent Linux versions.

Systemd is a set of tools for managing Linux systems. It is responsible for booting the computer, managing services, automounting filesystems, logging events, configuring the hostname, and a range of other system tasks.

This tutorial will lead you through listing services in Linux.

Listing Linux Services

Systemd employs the unit notion, which may refer to services, sockets, mount points, devices, and so on. Text files in ini format are used to specify units. These files include information on the device, its settings, and commands to run. The unit file type is defined by the filename extensions. System service unit files, for example, have a.service extension.

systemctl is a command-line tool for managing services and controlling systemd. It belongs to the systemd ecosystem and is installed by default on all platforms.

To retrieve a list of all loaded service units, type

 sudo systemctl list-units --type service

From left to right, each line of output has the following columns:

  • UNIT – The service unit’s name.
  • LOAD – Find out if the unit file has been loaded into memory or not.
  • ACTIVE – The high-level state of the unit file’s activation, and can be active, reloading, inactive, failed, activating, or deactivating. It is a broad statement about the SUB column.
  • SUB – The activation status of a low-level unit file. Depending on the unit type, the value of this field varies. For instance, a unit of type service can be in one of the following states: dead, exited, failed, inactive, or operating.
  • DESCRIPTION – Brief summary of the unit file.

By default, just the loaded active units are shown. To view both loaded and inactive units, use the —all option.

sudo systemctl list-units --type service --all

If you wish to view all installed unit files, not just those currently loaded, use:

sudo systemctl list-unit-files

Viewing Service Status

Use the systemctl status command to determine the current status of a service:

sudo systemctl status <service_name>.service

Where service name is the desired service unit’s name. To discover, for instance, the current status of the nginx service, you might execute:

sudo systemctl status nginx.service

You may omit the “.service” suffix. systemctl status nginx is identical to systemctl

status nginx.service.

● nginx.service - A high performance web server and a reverse proxy server
     Loaded: loaded (/lib/systemd/system/nginx.service; enabled; vendor preset: enabled)
     Active: active (running) since Wed 2022-1-23 19:13:50 UTC; 5s ago
       Docs: man:nginx(8)
    Process: 3061052 ExecStartPre=/usr/sbin/nginx -t -q -g daemon on; master_process on; (code=exited, status=0/SUCCESS)
    Process: 3061063 ExecStart=/usr/sbin/nginx -g daemon on; master_process on; (code=exited, status=0/SUCCESS)
   Main PID: 3061064 (nginx)
      Tasks: 2 (limit: 470)
     Memory: 6.0M
     CGroup: /system.slice/nginx.service
             ├─3061064 nginx: master process /usr/sbin/nginx -g daemon on; master_process on;
             └─3061065 nginx: worker process

Dec 23 19:13:50 pcplanet.dev systemd[1]: Starting A high performance web server and a reverse proxy server...

The command will provide the following output:

  • Loaded – Whether or not the service unit has been loaded, as well as the whole path to the unit file. In addition, it indicates if the device is configured to start automatically upon boot.
  • Active – If the service is functioning and operational. If your terminal supports color and the service is active and running, the dot and “active (running)” will be written in green if your terminal supports color and the service is active and running. The line also displays the service’s duration of operation.
  • Docs – Documentation on the service.
  • Process – Details on the service processes.
  • Main PID – The service PID.
  • Tasks – The number of tasks assigned to the unit and the maximum number of tasks.
  • Memory – Information about used memory.
  • CGroup – Information about related Control Groups.

To check the status of a service, use the systemctl is-active command. To test that the nginx service is operating, for instance, you might run:

systemctl is-active nginx.service
active
 

The command will display the status of the service. If the service is running, the command returns an exit status of 0, which is beneficial for employing the command within shell scripts.

Conclusion

We have demonstrated how to use the systemctl command to list and verify the status of Linux services.

If you have any questions or comments, please leave them below.

August 2, 2022 0 comments
2 FacebookTwitterPinterestEmail
LinuxNews

Best Linux distribution (distros) in 2022

by pcplanet August 1, 2022
written by pcplanet 15 mins read

In light of Linux’s meteoric rise in popularity, there’s now a Linux distribution for just about anybody with a computer. Linux distributions are available for both high-powered, high-end computers and older, lower-powered computers. We have a Linux distribution that is only 100 MB in size and can be put on an ancient disc, and we have another Linux distribution that is 4 GB in size and can be installed on the latest and greatest, ultra-fast solid-state drives.

There are Linux distributions designed for specialized audiences, such as home users, business users, developers, and large corporations.

Because of this, we have decided to provide an in-depth guide on the top 21 Linux distributions as of 2022. If you’re considering making the jump from Windows to Linux but aren’t sure which Linux distribution to choose, this article will clear up any confusion..

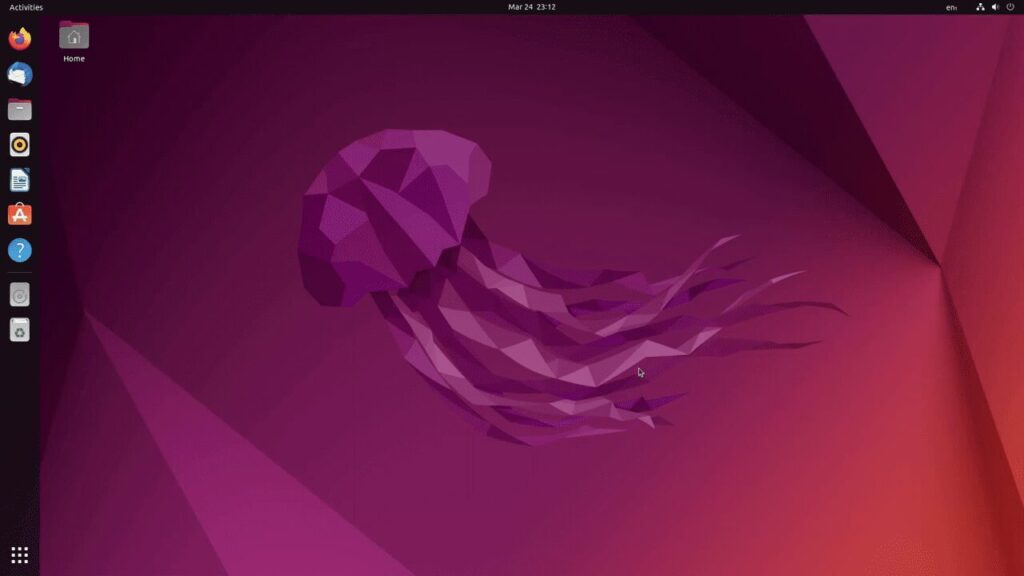
1. Ubuntu

Perfect for Businesspeople, Developers, and Everyday Users.

Ubuntu Linux is one of the distributions that has been around the longest and is among the most popular versions of the operating system. It is possible that the success of Ubuntu might be related to the fact that it is one of the Linux distributions that is both user-friendly and dependable. Even more so, Ubuntu makes it easier to switch from Windows to Linux by making it possible to run a wide number of well-known Windows apps with the assistance of third-party software such as Wine.

Users who are new to Linux or using it for the first time might quickly feel at ease because of the operating system’s intuitive user interface. Ubuntu is backed by a global network of developers that are committed to providing long-term support. Ubuntu has served as the foundation for the creation of a wide variety of Linux distributions, including LinuxMint, Kubuntu, and Lubuntu, among others.

Due to Ubuntu’s increasing popularity and demand, several laptop manufacturers have started providing laptops with Ubuntu pre-installed in lieu of Microsoft Windows. Everyone from a young kid taking online classes to an experienced programmer or system administrator would benefit from this package.

Download Ubuntu from here.

2. CentOS Rocky Linux

Ideal For: Software, web development, enterprise.

Rocky Linux, a Linux distribution, was made by the Rocky Enterprise Software Foundation. This distribution is based on the Red Hat Enterprise Linux (RHEL) code base, and it is meant to be a downstream, fully binary-compatible release. The goal of this project is to make a production-ready enterprise operating system that is supported by the community. Rocky Linux is a favorite among businesses that want a stable and safe Linux distribution, just like Red Hat Enterprise Linux and SUSE Linux Enterprise.

Rocky Linux’s first release candidate came out on April 30, 2021, and Rocky Linux was made available to the public for the first time on June 21, 2021. May 2029 is the last month that Rocky Linux 8 will be supported by the company.

Download Rocky from here

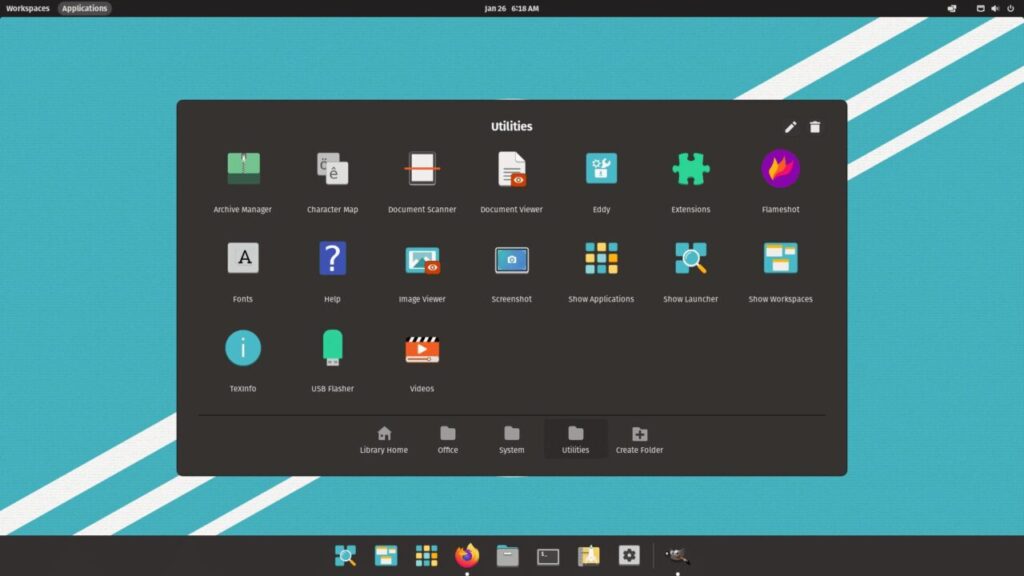
3. Pop!_OS

Perfect for: programmers and gamers

System76, a provider of computer hardware, was responsible for the creation and management of this product. On System76 laptops and desktops, Pop! OS is the default operating system. It is also free to download and install on other computers and laptops.

It is a feature-rich and visually appealing operating system. Pop! OS is also based on Ubuntu LTS, but it has its own distinct user interface that is simple to use.

This Linux distribution is ideal for gamers because it includes all of the necessary gaming tools. This distro works flawlessly with hybrid graphics cards, allowing you to take your gaming experience to the next level.

Pop! OS comes with a small number of apps, which saves space and allows you to easily install your favorite apps. Pop! Shop, like Ubuntu’s Software Center, allows you to download and install apps.

Download Pop!_OS from Here

4. Zorin OS

Suitable for: All users

Another Ubuntu-based Linux distribution on this list is Zorin OS. It is one of the most modern and visually appealing operating systems available. When the project began in 2008, the developers’ first priority was to create a user-friendly Linux-based operating system.

Zorin OS is available in three editions for download and installation: Pro, Core, and Lite. The Pro edition includes premium desktop layouts for popular operating systems like macOS, Windows 11 and classic, and Ubuntu. The Pro edition must be purchased, whereas the other two are completely free to download.

Professional users should choose the Pro edition, which includes a professional-grade creative suite of apps and advanced productivity software. If you have an older machine with limited hardware resources, you should choose the Lite edition, which is specifically designed for these machines.

Download Zorin OS from Here

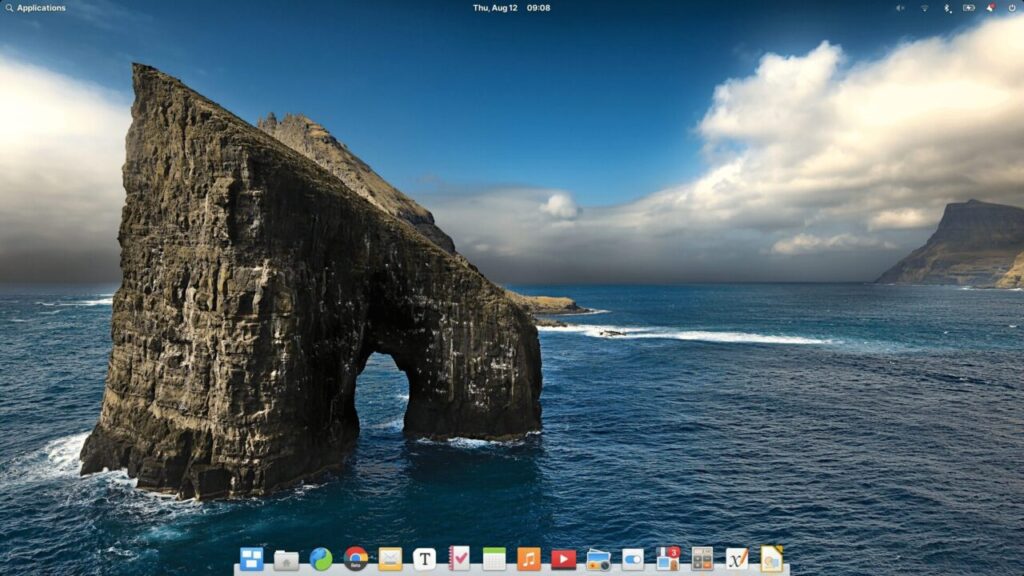
5. Elementary OS

Ideal for: Experienced Designers and Programmers in the Workplace

Another Linux distribution that has a stunning graphical user interface is called Elementary OS. Its user interface is streamlined and up-to-date, much like the user interface of macOS, which it resembles.

The most recent version of elementary OS is OS 6 Odin, which was released with a significant update to both the user interface and the set of features. Important new features include app sandboxing, multi-touch support, a dark theme, and a new installer. As a creator myself, I find that this Linux distribution, with its multitasking view, picture-in-picture mode, and do not disturb mode, is an excellent choice for my computer.

Elementary OS is an operating system that is completely open-source and free, in addition to being safe and respectful of users’ privacy. Because this Linux distribution is one of the most powerful and dependable, it has the potential to become the operating system of choice for computer programmers and network administrators.

Download Elementary OS from Here

6. Tails

Ideal For: Edward Snowden.

The Amnesic Incognito Live System (Tails) is an operating system designed to prevent monitoring and censorship of its users. Specifically, it employs the anonymizing services of the Tor network.

It is a live OS because it can be booted from a USB drive on any computer, and it does not leave any traces on the host machine.

When it comes to Linux distributions, many people opt for Tails because of how well it handles encrypted connections. Tor is a network that redirects all

Download Tails here

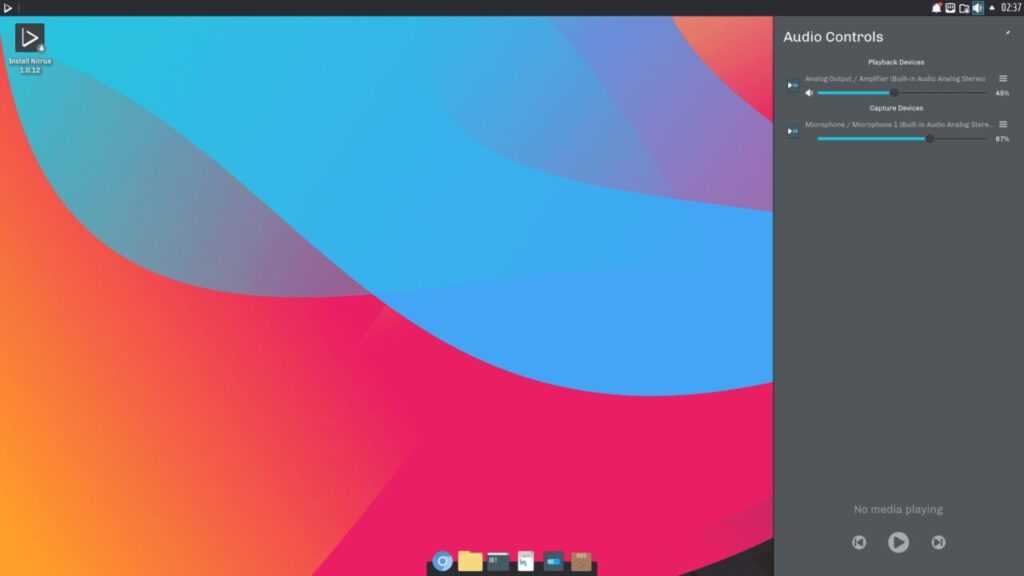
7. Nitrux

Perfect for: Those Who Are Just Starting Out with Linux

The Nitrux Linux distribution was built on top of Debian, KDE, and Qt. On top of KDE Plasma 5, it includes the NX desktop and NX firewall.

Those migrating from Mac OS X or Windows will be pleasantly surprised by how intuitive Nitrux really is. AppImages are supported by default on Nitrux, simplifying the process of adding new applications.

There is a thriving online community for this distribution, where you can ask questions and get answers on any subject. Nitrux 1.6.1 is the current release, and while it is currently only available in a 64-bit variant, it can be easily installed on older computers.

Download Nitrux from Here

8. Kodachi

Ideal For: A user who values their privacy or Snowden’s less important cousin.

Kodachi is one of the most secure and anonymous operating systems, earning it the moniker “The Secure OS” from its publisher. Kodachi was built on Ubuntu 18.04.6, and it is simple enough for novices to use.

Kodachi is a live OS that can be booted from a DVD, USB drive, or SD card and used on any computer. A highly secure operating system, as was already mentioned. All of your internet traffic is routed through an encrypted virtual private network (VPN) and then the anonymizing Tor network, with your DNS queries also encrypted.

In the absence of a user-initiated action, it does not alter the state of the computer it is installed on. Kodachi is a Xubuntu/Debian-based Linux distribution that features the XFCE desktop environment.

Download Kodachi from Here

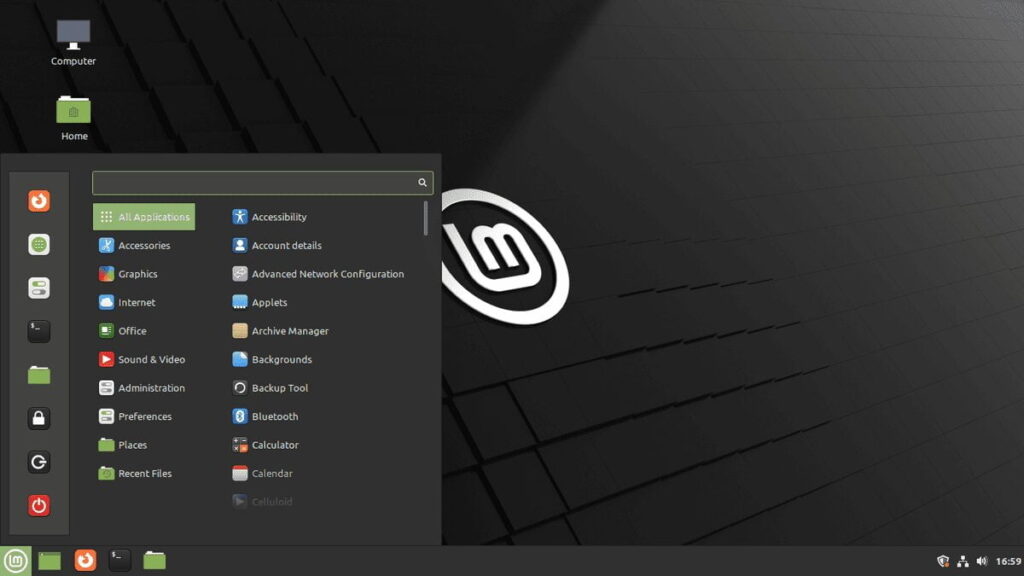
9. LinuxMint

Ideal for: Newcomers and those transitioning from Windows

LinuxMint’s popularity is rising alongside that of Ubuntu; in fact, among new users, LinuxMint is gaining ground since it is easier to use and more lightweight. As previously said, LinuxMint is built on Linux, therefore you can experience the core of Ubuntu in LinuxMint.

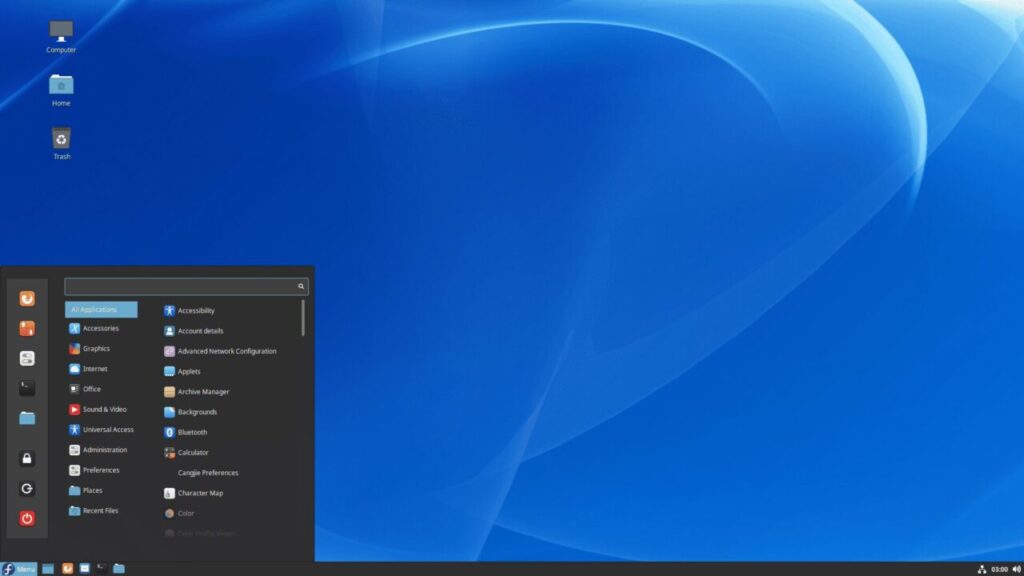
Cinnamon desktop provides a comparable or even greater desktop experience with a small footprint, making it a perfect substitute for Windows. Yes, it takes less hardware resources, making it an excellent choice for older PCs and laptops.

LinuxMint, like Ubuntu, has a sizable online community behind it. All of the software available for Ubuntu operate flawlessly on LinuxMint..

Download LinuxMint from Here

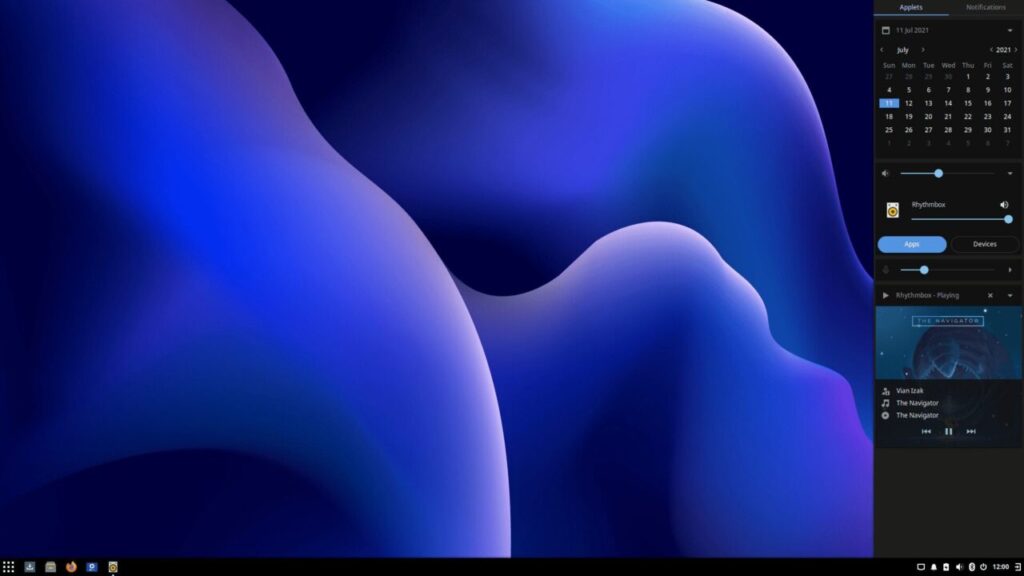
10. Solus

Perfect for all you coders and devs out there!

The Solus operating system is both beautiful and refined in appearance; it was developed independently on the Linux kernel and provides users with their choice of the Budgie, MATE, KDE Plasma, or GNOME desktop environments.

Solus is a robust operating system that works smoothly even on less-capable hardware. As I was saying before, it really is the best Linux distribution for developers and programmers. On the other hand, its simplicity makes it a good choice for first-time Linux users.

Many common development tools are included with the installation of Solus, making it a great distribution for programmers. The eopkg package manager, which is included in Solus, may be a temporary stumbling block for new users.

Download Solus from Here

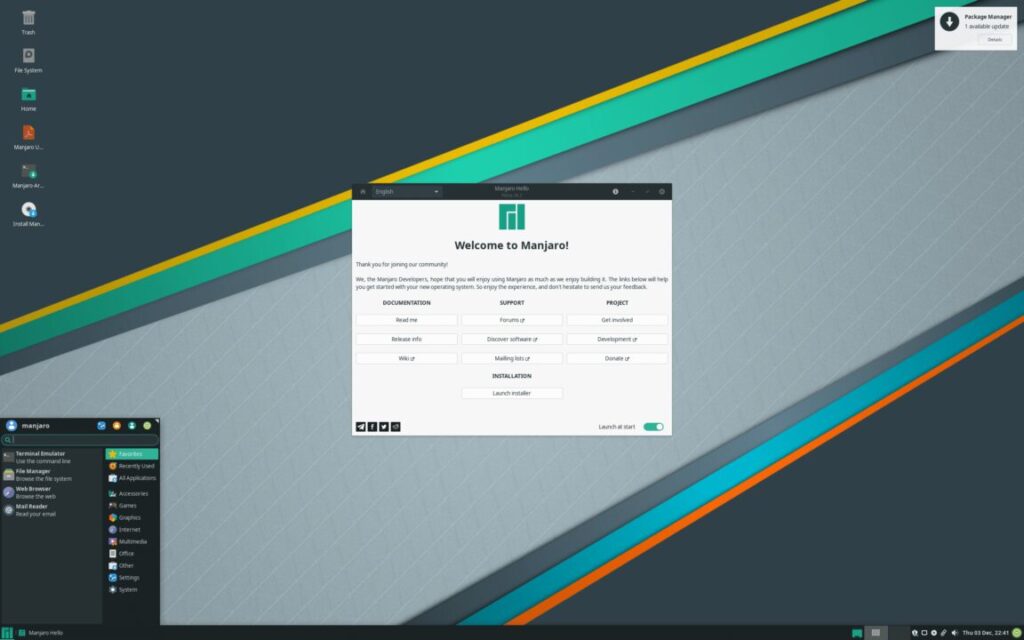
11. Manjaro

Great for both first-time users and seasoned pros.

Manjaro is an open-source, free Linux distribution that was built on top of the Arch Linux kernel. It can be used as an alternative to Mac OS X and Windows.

Manjaro is a lightweight Linux distribution that prioritizes a speedy boot time and streamlined automation tools. With the help of compatibility programs like Wine, Steam, PlayOnLinux, and Proton, Windows and macOS users can run all of their usual software on Manjaro as well.

If you’re looking for a Linux distribution that’s suitable for any kind of user, look no further than Manjaro.

Download Manjaro from Here

12. CentOS Stream

Best Used For: Putting in place server infrastructure.

Red Hat Enterprise Linux is based on the Linux-based CentOS Stream, a development platform (RHEL). CentOS Stream is one of the most stable and powerful Linux distributions, making it an excellent choice for a server.

Prior to the release of CentOS Stream, RHEL had a discontinued operating system known simply as CentOS. CentOS 8 was the last version of CentOS to be released. After the RHEL-backed CentOS series was discontinued, CentOS 8’s support lifecycle was shortened from 2029 to 2021.

It’s the best Linux distribution for server installation and support, thanks to its compatibility with the RPM and Yum package management systems.

Download CentOS Stream from Here

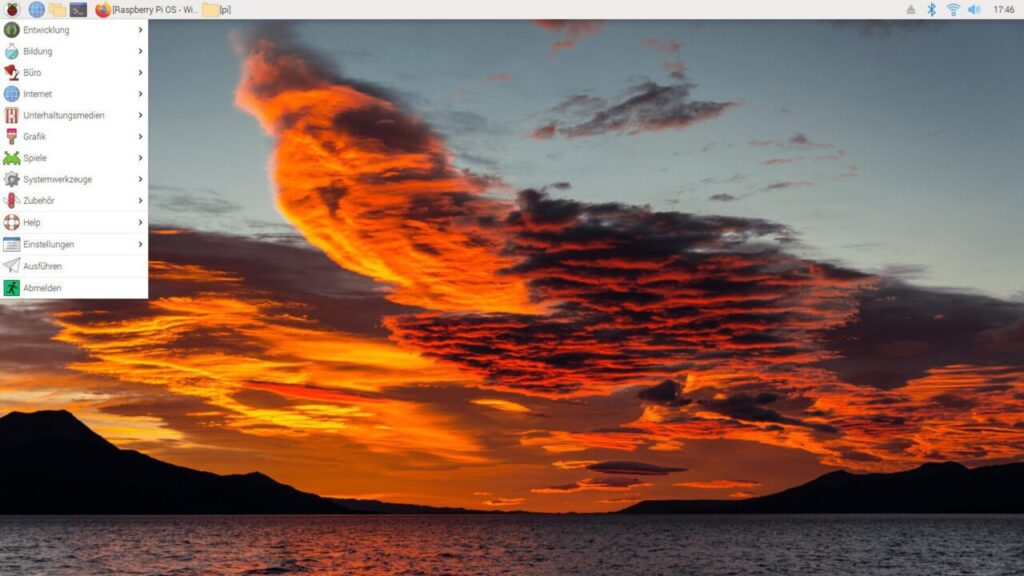
13. Raspberry Pi OS

Ideal For: Everyone.

Raspberry Pi has gained popularity because it allows more people to own a computer by providing them with a tiny and cheap option. It’s a great OS for everyone from students to professionals at multinational corporations, as its slogan, “Teach, Learn, and Make,” suggests.

Raspberry Pi OS is the Raspberry Pi Foundation’s proprietary operating system, and it is typically preinstalled on Raspberry devices. You can get right to work after installing Raspberry Pi OS because it is based on Debian and has many helpful applications already installed.

With its minimal Pixel desktop environment, Raspberry Pi OS is a great choice for older computers.

Download Raspberry Pi OS from Here

14. Kali Linux

Ideal For: Hackers

When it comes to picking the best Linux distribution for ethical hacking, no other option compares to Kali Linux. It is a Linux distribution built on the Debian base and tailored for use in high-level security assessments, reverse engineering, research, and forensics..

Kali Linux is an operating system that features numerous applications useful for conducting digital forensics and other forms of ethical hacking. Since it is based on Debian, the majority of its packages come from the Debian project’s official archives.

Kali is a versatile OS that can be used on a wide variety of devices, including desktop computers, Android smartphones, Raspberry Pis, and Chromebooks.

Download Kali Linux from Here

15. openSUSE Leap

Suitable for both novices and seasoned pros.

There are two primary releases of openSUSE: the rolling-release Tumbleweed and the long-term supported Leap Linux distribution.

openSUSE Leap comes pre-loaded with a wide variety of applications and utilities that can be of use to both novice and experienced Linux users. It has a beautiful, straightforward interface that can be used by anyone with minimal training.

Installed software such as YaST allows for configuration adjustments to suit individual preferences. YaST makes it simple to set up widely used desktop environments like KDE, Gnome, and Mate.

Download openSUSE Leap from Here

16. Fedora

Ideal For: Everyone.

Fedora is a Linux distribution backed by Red Hat and numerous other companies, but it is free and open-source to anyone who wants it. Fedora 34 is the most recent release, and it includes a number of improvements over previous versions.

Fedora is well-known for developing cutting-edge, freely accessible infrastructure for virtual machines, cloud services, and containerization.

Download Fedora from Here

17. MX Linux

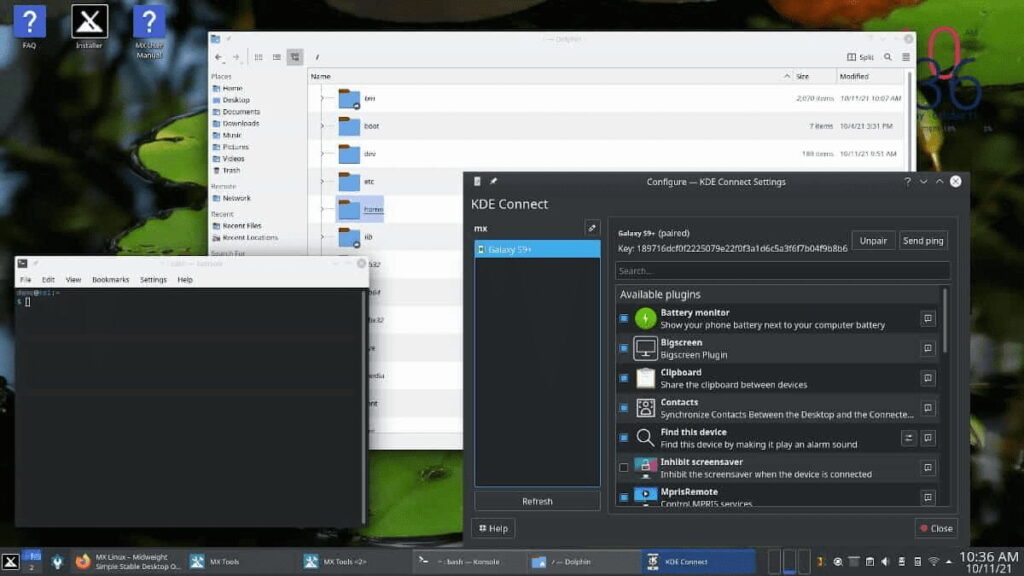
XFCE, KDE, and Fluxbox are the three desktop environments that are included with the MX Linux distribution, which is a lightweight distribution of the Linux operating system. MX Linux has recently come to the forefront of the computing world and has seen a surge in popularity thanks to the strength and dependability of its operating system.

MX Linux is a Linux distribution that was initially made available in 2014, and it is based on the Debian operating system. It comes pre-packaged with a variety of graphical user interface (GUI) tools, which makes it very simple to use for users porting in from macOS or Windows. Because the user interface is so straightforward, even first-time users quickly feel at ease with its functionality.

Download MX Linux from Here

18. Rescatux

Perfect for: Fixing corrupted Linux and Windows setups

To repair corrupted Linux and Windows installations and boot loaders, Rescatux, a live Linux distribution based on Debian, employs a graphical wizard called Rescapp.

Rescatux includes many helpful tools for repairing damaged Linux and Windows installations. A novice user will have no trouble getting started with it thanks to the intuitive design of its user interface.

Rescatux is a Linux distribution that uses the LXDE desktop environment and is small and lightweight, making it a great choice for older or less powerful computers. Rescapp is a program that can be used to restore bootloaders, fix storage partitions, reset passwords, and repair file systems.

Download Rescatux from Here

19. Linux Lite

Ideal for both home and office use.

Linux Lite is a lightweight Linux distribution that draws inspiration from both Debian and Ubuntu. This Linux distribution was created with Windows users of legacy hardware in mind. The developers’ goal with this “gateway operating system” is to make switching from Windows to Linux Lite as painless as possible.

Linux Lite is a stripped-down version of the Linux operating system that runs efficiently on less powerful hardware, making it a good choice for older computers and lightweight laptops. Although it may be the easiest Linux distribution to set up and use, it still includes many popular features and programs.

Download Linux Lite from Here

20. TinyCore Linux

The Linux kernel is the foundation for TinyCore Linux, the smallest Linux distribution at just 16 MB. Robert Shingledecker created three different versions of his invention.

Core, the first available variant, is best suited for advanced users due to its exclusive command-line interface. However, a GUI-capable system can be developed by using command-line tools to add necessary extensions. This version is only 16 MB in size.

TinyCore, the second option, is a lightweight Linux distribution (distribution) that weighs in at just 21 MB. A graphical user interface is integrated into the system’s core functionality.

Finally, CorePlus, the third variant, is a complete installation image measuring 163 MB and includes extra features in comparison to the other two variants.

Download TinyCore Linux from Here

21. Deepin

Debian-based Deepin is a Linux distribution with a deepin desktop environment. A beautiful and dependable desktop OS, it has many practical applications. Deepin Technology Co.,Ltd. created and released it.

Deepin comes standard with the applications it highlights pre-installed, and you’ll use them frequently. Deepin 20.2.4, the most recent version, has a slick and contemporary user interface. It’s the perfect Linux distribution for anyone.

Download Deepin from Here

August 1, 2022 0 comments
0 FacebookTwitterPinterestEmail
LinuxUbuntu

The Nmap Tool and How to Use It

by pcplanet July 27, 2022
written by pcplanet 10 minutes read

Nmap is a sophisticated tool for scanning networks, and it is used for doing security audits and penetration tests. It is one of the most essential tools that network managers may make use of when it comes to diagnosing issues with network connections and carrying out port scanning.

In addition, Nmap can determine the Mac address, operating system kind, service version, and a great deal more.

This tutorial will walk you through the fundamentals of using the nmap command to carry out a variety of network-related activities.

Installing Nmap

Nmap is an application that may be installed on a variety of different platforms, including all of the main operating systems. It was first distributed as an utility that was only compatible with Linux, but subsequently it was adapted to other operating systems such as macOS, Windows, and BSD.

There is also a graphical user interface for Nmap called Zenmap, which you may use if you find the command line less appealing.

The Nmap download page provides access to the official binary packages, which may be installed on your computer.

The process of installation is not complicated and differs depending on the operating system that you are using.

Installing Nmap on Ubuntu and Debian

Nmap may be downloaded from the default repositories for both Ubuntu and Debian. To install it, you need to run:

sudo apt update
sudo apt install nmap
 

Installing Nmap on CentOS and Fedora

On CentOS and other Red Hat derivatives, the following programmes may be run:

sudo dnf install nmap

Installing Nmap on macOS

Installing Nmap on a macOS device may be accomplished either by downloading the “.dmg” installation package from the Nmap website or by using Homebrew:

brew install nmap

Installing Nmap on Windows

The Windows implementation of Nmap is often a bit slower and comes with a few more restrictions in comparison to the UNIX version.

Downloading the self-installation executable file for Nmap and running it is the simplest method available for installing Nmap on Windows.

On Windows, you can execute Nmap using either the command line or the Zenmap software. Both of these methods are available to you. Check out the post-install use instructions if you want further information on how to use Nmap on Windows.

Using Nmap

Nmap is commonly used to do tasks such as auditing network security, network mapping, locating online devices, and identifying open ports.

The following is a condensed version of the nmap command’s original syntax:

nmap [Options] [Target...]

The most basic method of using Nmap is to do a scan on a single target while logged in as the regular user and without supplying any options:

nmap scanme.nmap.org
Starting Nmap 7.91 ( https://nmap.org ) at 2022-12-16 20:19 CET
Nmap scan report for X (x.x.x.x)
Host is up (0.048s latency).
Not shown: 981 closed ports
PORT     STATE    SERVICE
21/tcp   open     ftp
22/tcp   open     ssh
25/tcp   open     smtp
53/tcp   open     domain
80/tcp   open     http
110/tcp  open     pop3
143/tcp  open     imap
443/tcp  open     https
587/tcp  open     submission
993/tcp  open     imaps
995/tcp  open     pop3s
1025/tcp open     NFS-or-IIS
1080/tcp open     socks
8080/tcp open     http-proxy
8081/tcp open     blackice-icecap

Nmap done: 1 IP address (1 host up) scanned in 1.78 seconds

TCP connect scan is performed by nmap whenever it is called by a user other than root who does not have raw packet rights. In unprivileged mode, the (-sT) switch is activated automatically and by default.

The result will seem somewhat like this, and it will provide fundamental information about the scan as well as a list of open and restricted TCP ports.

The TCP SYN scan (-sS) is the most used scan option since it works against all compliant TCP stacks, is quicker than the connect option, and is thus the most popular.

When nmap is run in the context of a user with administrative capabilities, the -sS switch is automatically enabled.

sudo nmap 10.0.0.25

Increase the verbosity of the output by using the -v or -vv switch to get more specific information:

sudo nmap -vv 10.0.0.25

In order to conduct a UDP scan, you must run the following command as the root user while using the (-sU) option:

sudo nmap -sU 10.0.0.25

For a complete list of port scanning methods, visit the Nmap documentation page .

IPv6 addresses may also be scanned using Nmap. Use the -6 option if you want to provide an IPv6 host:

sudo nmap -6 fd12:3456:789a:1::1

Specifying Target Hosts

Nmap considers any arguments that are not options to be target hosts and processes them accordingly.

If an argument starts with a dash, whether it be a single dash or a double dash, it is considered an alternative.

The approach that is the most straightforward is to provide one or more domain names or destination addresses:

nmap 10.0.0.25 host.to.scan

You may define a network range by using the CIDR notation, which is as follows:

nmap 10.0.0.0/24

Using the dash character allows you to define an octet range. For instance, the following would need to be done in order to scan 192.168.10.1, 192.168.11.1, and 192.168.12.1:

nmap 10.0.0-12.1

The comma is also a character that may be used to define the targets that you want to hit. The next command aims for the same hosts as the one that was just executed:

nmap 10.0.0,11,12.1

You are able to mix any and all forms:

nmap 10.8-10.10,11,12.0/28  10.0.0-2.100,101

Use the list scan option (-sL), which just lists the targets without actually executing a scan, to be absolutely certain that you have chosen the appropriate hosts before beginning the scanning process:

nmap -sL 10.8-10.10,11,12.0/28  10.0.0-2.100,101

Utilize the —exclude option if you want to exclude scanning for targets that fall inside the range that you have defined.

nmap 10.8-10.10,11,12.0/28 --exclude 10.10.12.12

Specifying and Scanning Ports

Nmap is configured to carry out a cursory search for the 1000 most frequently used ports by default. These ports are not the first 1000 ports in sequential order; rather, they are the 1000 ports that are used the most often, with numbers ranging from 1 to 65389.

Utilize the -p option to search for ports ranging from 1 all the way up to 65535:

nmap -p- 10.0.0.25

Each port may be in any of these statuses at any one time:

  • open – Requests are fulfilled by the application that is currently executing on the port.
  • closed – The port is not used by any programmes, and the host just responds to requests that are made.
  • filtered – There is no response from the host to the request.

For instance, if you simply wanted to scan port 443, you would use the following command:

nmap -p 443 10.0.0.25

In order to specify more than one port, you must separate the target ports with a comma, like follows:

nmap -p 80,443 10.0.0.25

It is possible to specify port ranges by using the dash sign. To scan all UDP ports ranging from 1 to 1024, for instance, you might execute the following command:

sudo nmap -sU -p 1-1024 10.0.0.25

All combined:

nmap -p 1-1024,8080,9000 10.0.0.25

The port’s name may also be used in place of the port number to specify the port. For instance, the following might be used in order to do a scan for the ssh port:

nmap -p ssh 10.0.0.25

Ping Scanning

Invoke the nmap command with the -sn option to carry out a ping scan or conduct host discovery:

sudo nmap -sn 192.168.10.0/24

Nmap is instructed by the -sn option to do merely a search for online hosts rather than a port scan. When you need a fast way to identify whether of the hosts you mentioned are up and functioning, this is a valuable tool.

Disabling DNS Name Resolution

The default behavior of Nmap is to carry out reverse-DNS resolution for each host that is identified. This causes the scan duration to rise.

It is a good idea, when scanning big networks, to stop reverse-DNS resolution, since this will speed up the scanning process. To do this, you need to run the command with the -n option:

sudo nmap -n 10.0.0.0/16

OS, Service and Version Detection

Through the use of TCP/IP stack fingerprinting, Nmap is able to determine the operating system of the remote host. Invoke the command with the -O option to do the operating system detection:

sudo nmap -O scanme.nmap.org
...
Device type: general purpose
Running: Linux 5.X
OS CPE: cpe:/o:linux:linux_kernel:5
OS details: Linux 5.0 - 5.4
Network Distance: 18 hops

OS detection performed. Please report any incorrect results at https://nmap.org/submit/ .
Nmap done: 1 IP address (1 host up) scanned in 26.47 seconds

If Nmap is able to identify the host operating system, it will provide output similar to the following:

Generally speaking, system services will only listen on standard ports that have been specifically designated for them and are widely recognised. For instance, if the port that is associated with the SSH service (port 22) is open on the host, you will presume that an SSH server is running on the host. On the other hand, you can’t be one hundred percent certain since individuals are free to operate services on whatever port they like.

Nmap’s service and version detection features will let you know what software is listening on the port as well as the version of that programme.

Utilize the -sV option to do a search for the service and version:

sudo nmap -sV scanme.nmap.org
...
PORT      STATE    SERVICE      VERSION
19/tcp    filtered chargen
22/tcp    open     ssh          OpenSSH 6.6.1p1 Ubuntu 2ubuntu2.13 (Ubuntu Linux; protocol 2.0)
80/tcp    open     http         Apache httpd 2.4.7 ((Ubuntu))
135/tcp   filtered msrpc
139/tcp   filtered netbios-ssn
445/tcp   filtered microsoft-ds
9929/tcp  open     nping-echo   Nping echo
31337/tcp open     tcpwrapped
Service Info: OS: Linux; CPE: cpe:/o:linux:linux_kernel

Nmap Output

The information is delivered to standard output by default when you use Nmap (stdout).

You have the option of saving the output to a file, which is useful if you are scanning a big network or if you require the information for later use.

Nmap has several different output kinds. Use the -oN option, followed by the file name, to save the output in normal format:

sudo nmap -sU -p 1-1024 10.0.0.25 -oN output.txt

Choosing to save the output in XML format is by far the most common choice. To do this, make advantage of the -oX option:

sudo nmap -sU -p 1-1024 10.0.0.25 -oX output.xml

Another format that is helpful is the grepable output, which can be processed using the typical tools that come with Unix, such as grep, awk, and cut. The -oG option allows you to specify the output to be grepable:

sudo nmap -sU -p 1-1024 10.0.0.25 -oG output

Nmap Scripting Engine

The scripting engine in Nmap is often regarded as one of the program’s most powerful capabilities. In addition to the hundreds of scrips that come pre-installed with Nmap, you have the ability to develop your own scrips using the Lua programming language.

Scrips may be used for a wide variety of purposes, including finding malware and backdoors, performing brute-force assaults, and more.

For instance, the following tools may be used to determine whether or not a certain host has been compromised:

nmap -sV --script http-malware-host scanme.nmap.org

Conclusion

Nmap is a tool that is available for free download and is generally used by network managers to find hosts and scan ports.

Please take notice that it is against the law in certain countries to scan networks without first obtaining authorisation to do so.

In the event that you have any inquiries or observations, do leave a comment down below.

July 27, 2022 0 comments
1 FacebookTwitterPinterestEmail
LinuxUbuntu

How to Configure Static IP Address on Ubuntu 16.04 to 22.04

by pcplanet July 22, 2022
written by pcplanet 6 mins read

How to Configure Static IP Address on Ubuntu 16.04 to 22.04

This article will walk you through the process of configuring Ubuntu 20.04 to use a static IP address.

The DHCP server on the router is often responsible for dynamically assigning IP addresses in the majority of network setups. The assignment of a static IP address may be necessary in a variety of contexts, including the configuration of port forwarding and the operation of a media server, for example.

Implementing Static IP Address Configuration Using DHCP

Configuring a Static DHCP server on your router is the simplest and most recommended method for assigning a static IP address to a device on your local area network (LAN). Static DHCP, also known as DHCP reservation, is a feature that can be found on most routers. This feature instructs the DHCP server to always issue the same IP address to a particular network device whenever that device makes a request for an address from the DHCP server. A static IP is given to the device so that it may be identified by its unique MAC address.

Different routers have different procedures that must be followed in order to configure a DHCP reservation. For further information, please refer to the documentation provided by the vendor.

Netplan

Starting with version 17.10, the network administration utility that comes pre-installed with Ubuntu is Netplan. When configuring the network, earlier versions of Ubuntu relied on the ifconfig utility and the /etc/network/interfaces configuration file that came with it.

The configuration files for Netplan are saved with a .yaml file extension and are authored using YAML syntax. In order to use Netplan to setup a network interface, you will first need to write a YAML description of the interface. After this has been completed, Netplan will build the necessary configuration files for the renderer tool that you select.

Both NetworkManager and Systemd-networkd are supported renderers for use with Netplan. Systemd-networkd is often utilized on servers that do not have a graphical user interface (GUI), while NetworkManager is typically utilized on desktop computers.

Setting up a Fixed IP Address on the Ubuntu Server

Quick way:

Change the config which is located over at  sudo nano /etc/netplan/01-netcfg.yaml from:

/etc/netplan/01-netcfg.yaml

network:
  version: 2
  renderer: networkd
  ethernets:
    ens3:
      dhcp4: yes

To:

/etc/netplan/01-netcfg.yaml

network:
  version: 2
  renderer: networkd
  ethernets:
    ens3:
      dhcp4: no
      addresses:
        - x.x.x.x/24
      gateway4: x.x.x.x
      nameservers:
          addresses: [8.8.8.8, 1.1.1.1]

Fill in Xs with your own IP

American tour bus way:

“Predictable network interface names” are the method by which the system in Ubuntu 20.04 recognizes the various network interfaces.

The first thing you need to do in order to set up a static IP address is to determine the name of the ethernet interface that will be used for the configuration. To do this, use the ip connect command, as illustrated in the following example:

ip link

This command will produce a list of all of the network interfaces that are currently accessible. The name of the interface is ens3 in this particular illustration:

1: lo: <LOOPBACK,UP,LOWER_UP> mtu 65536 qdisc noqueue state UNKNOWN mode DEFAULT group default qlen 1000
    link/loopback 00:00:00:00:00:00 brd 00:00:00:00:00:00
2: ens3: <BROADCAST,MULTICAST,UP,LOWER_UP> mtu 1500 qdisc fq_codel state UP mode DEFAULT group default qlen 1000
    link/ether 08:00:27:6c:13:63 brd ff:ff:ff:ff:ff:ff

The /etc/netplan directory is where all of the configuration files for Netplan are kept. This directory most likely contains one or more YAML files for you to look over. There is a possibility that the name of the file will change depending on the setting. The name of the file is typically 01-netcfg.yaml, but it may also be interfaceName.yaml or 50-cloud-init.yaml. However, the name of the file on your system could be different.

You will need to deactivate cloud-init if it was used to provision the Ubuntu cloud instance you are working with. In order to accomplish this, please produce the following file:

sudo nano /etc/cloud/cloud.cfg.d/99-disable-network-config.cfg
network: {config: disabled}

Open up the YAML configuration file using your preferred text editor in order to assign a static IP address to the network interface:

sudo nano /etc/netplan/01-netcfg.yaml

/etc/netplan/01-netcfg.yaml

network:
  version: 2
  renderer: networkd
  ethernets:
    ens3:
      dhcp4: yes

First, let’s go through a brief explanation of the code before we make any changes to the settings.

Every Netplan YAML file begins with the network key, which must have a minimum of two mandatory items. The kind of the device is the second needed component after the version of the network configuration format, which is the first essential element. It is possible for the device type to be an ethernet, bond, bridge, or vlan.

A line that displays the kind of renderer is also included in the setup that was just shown. If you installed Ubuntu in server mode, then the renderer will automatically be set up to utilize networkd as the back end. This is the default configuration.

You have the ability to select one or more network interfaces under the ethernets heading of the device’s type. In this particular illustration, we only have one interface, designated as ens3, that is set up to receive IP addressing information from a DHCP server (dhcp4: yes).

Make the following edits to the file in order to provide a static IP address to the ens3 interface:

  • Set DHCP to dhcp4: no.
  • Specify the static IP address. Under addresses: you can add one or more IPv4 or IPv6 IP addresses that will be assigned to the network interface.
  • Specify the gateway.
  • Under nameservers, set the IP addresses of the nameservers.

/etc/netplan/01-netcfg.yaml

network:
  version: 2
  renderer: networkd
  ethernets:
    ens3:
      dhcp4: no
      addresses:
        - 10.0.0.25/24
      gateway4: 10.0.0.1
      nameservers:
          addresses: [8.8.8.8, 1.1.1.1]

When modifying Yaml files, you must ensure that the code indentation rules for YAML are followed. The modifications will not be implemented if the syntax cannot be rectified beforehand.

After you have finished, be sure to save the file and apply the modifications by executing the following command:

sudo netplan apply

Verify the changes by typing:

ip addr show dev ens3
 2: ens3: <BROADCAST,MULTICAST,UP,LOWER_UP> mtu 1500 qdisc mq state UP group default qlen 1000
    link/ether 08:00:27:6c:13:63 brd ff:ff:ff:ff:ff:ff
    inet 10.0.0.25/24 brd 10.0.0.255 scope global dynamic ens3
       valid_lft 3575sec preferred_lft 3575sec
    inet6 fe80::5054:ff:feb0:f500/64 scope link
       valid_lft forever preferred_lft forever

You have provided your Ubuntu server with a fixed Ip.

Creating a Static IP Address Configuration on Your Ubuntu Desktop

There is no need for technical skills to configure Ubuntu Desktop machines to use a static IP address.

Search for “settings” in the Activities screen’s search bar, then click on the icon that appears. The GNOME settings window will pop up when you do this. To make changes to the interface, select either the Network or Wi-Fi tab and then click the appropriate button. To access the settings for the interface, choose the cog icon that is located to the right of the interface’s name.

Choose “Manual” from the drop-down menu under “IPV4” Method, then input your static IP address, Netmask, and Gateway. After you are finished, click the “Apply” button.

To verify the changes, open your terminal either by using the Ctrl+Alt+T keyboard shortcut or by clicking on the terminal icon and run:

ip addr

The output will show the interface IP address:

...
2: wlp1s0: <BROADCAST,MULTICAST,UP,LOWER_UP> mtu 1500 qdisc noqueue state UP group default qlen 1000link/ether 50:5b:c2:d8:59:7d brd ff:ff:ff:ff:ff:ffinet 10.0.0.25/24 brd 10.0.0.255 scope global dynamic noprefixroute wlp1s0
valid_lft 38963sec preferred_lft 38963sec
inet6 fe80::45e3:7bc:a029:664/64 scope link noprefixroute
 

Conclusion

We’ve shown you how to configure a static IP address on Ubuntu 20.04.

If you have any questions, please leave a comment below.

July 22, 2022 0 comments
0 FacebookTwitterPinterestEmail
LinuxUbuntu

How to Install WordPress on Ubuntu 16.04 to 22.04 LTS Server (LAMP)

by pcplanet July 11, 2022
written by pcplanet 8 mins read

Introduction

There are currently several content management systems (CMSs) available, such as WordPress, which enable users to put up blogs in addition to whole websites with just a few clicks of the mouse. These CMSs are beneficial for those who do not have the financial means or time to construct websites from scratch.

WordPress is a robust content management system (CMS) used by millions of people around the world to power their blogs and fully functional websites. It is free, open-source, and extensible.

Installing it and learning how to use it is not difficult at all, and this is particularly true for those who have no previous experience with the creation and construction of websites. You can customize the functionality and appearance of your website or blog exactly as you want it to be thanks to the availability of millions of plugins and themes that were produced by an active and committed community of other users and developers. These plugins and themes may be downloaded from the WordPress plugin repository.

Requirements:

In this tutorial, we are going to walk you through the process of installing the most recent version of WordPress on Ubuntu 22.04 all the way down to Ubuntu 16.04 using the LAMP (Linux, Apache, MySQL, and PHP) stack.

I’m currently setting it up on an LXC container with Ubuntu 20.04 as a template.

You may install WordPress by following the instructions below.

Set up the LAMP stack on your Ubuntu server.

Before moving on to install WordPress, we kind of need to install the whole framework on which it will run, right?

Step 1: Set up Apache on Ubuntu

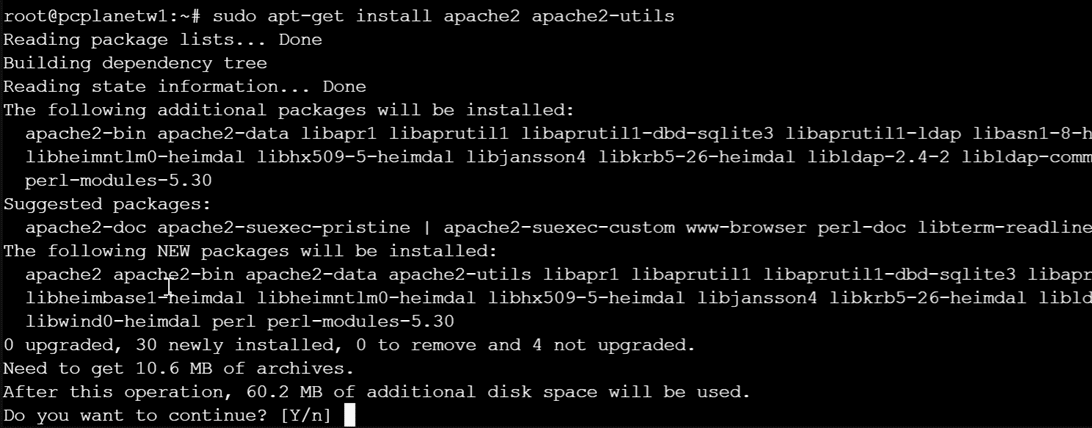
First, update and upgrade the software package list and then install the Apache webserver using the following commands.

sudo apt-get update
sudo apt-get upgrade
sudo apt-get install apache2 apache2-utils
Figure 1. Fresh template being updated

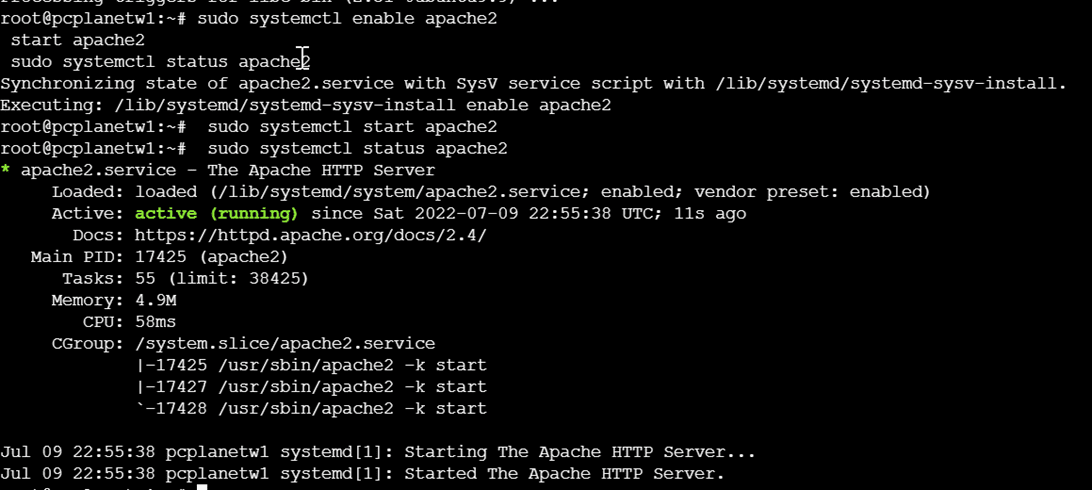
The Apache2 web server must be set up to automatically start with the OS at startup. Following these commands, we need to start the service and verify its status:

sudo systemctl enable apache2
sudo systemctl start apache2 
sudo systemctl status apache2

After you have started Apache, you will need to make the necessary changes on your UFW firewall in order to enable traffic through HTTP as shown below.

sudo ufw allow in "Apache"
sudo ufw status
Open Apache Port on UFW Firewall
Note: we have our own firewall solutions which is why it is set to inactive

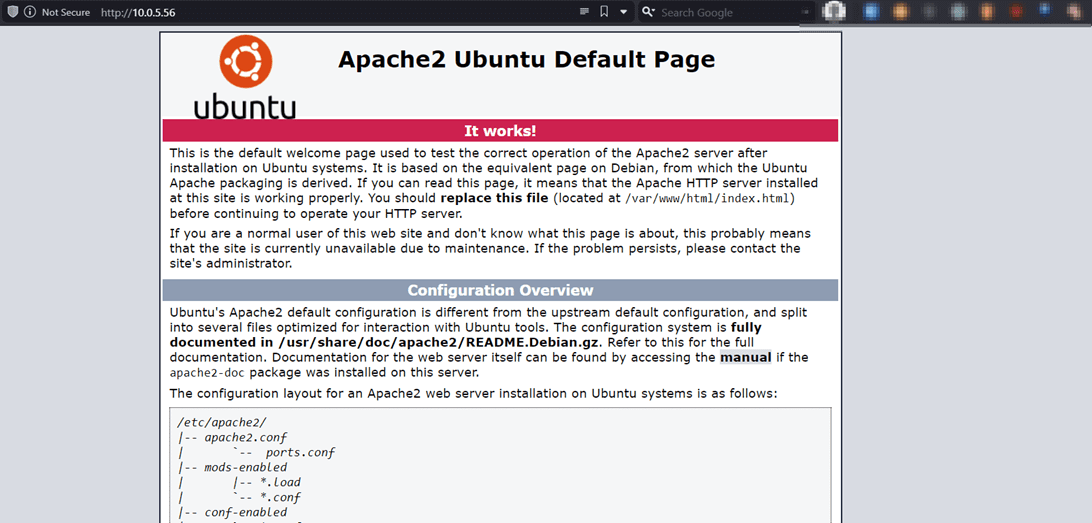
Launch your web browser, and with it open, type the following URL into the address bar to determine whether the Apache server is active:

http://server_address
or
http://your-domain.com

If the webserver is up and functioning properly, the default index page for Apache2 will be shown.

Apache Default Page Under Ubuntu

Note: The /var/www/html directory serves as the root directory for Apache by default; all of your website files will be placed in this location.

Step 2: Perform the installation of the MySQL Database Server.

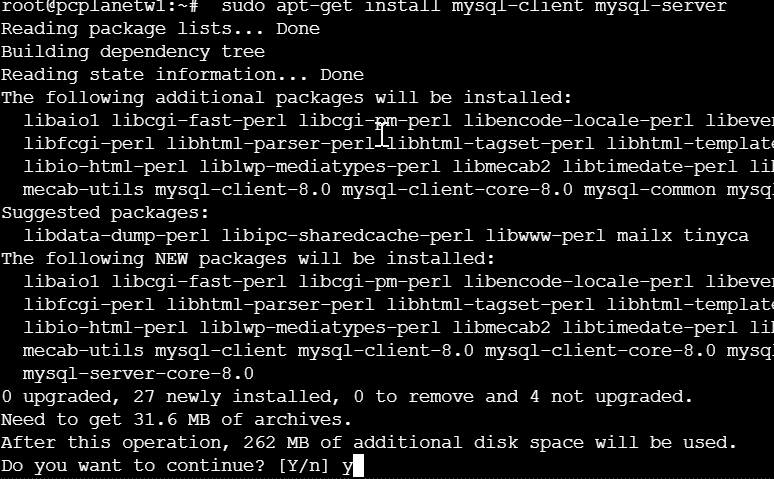
In the next step, we will install the MySQL database server by executing the following command:

 sudo apt-get install mysql-client mysql-server
Install MySQL in Ubuntu

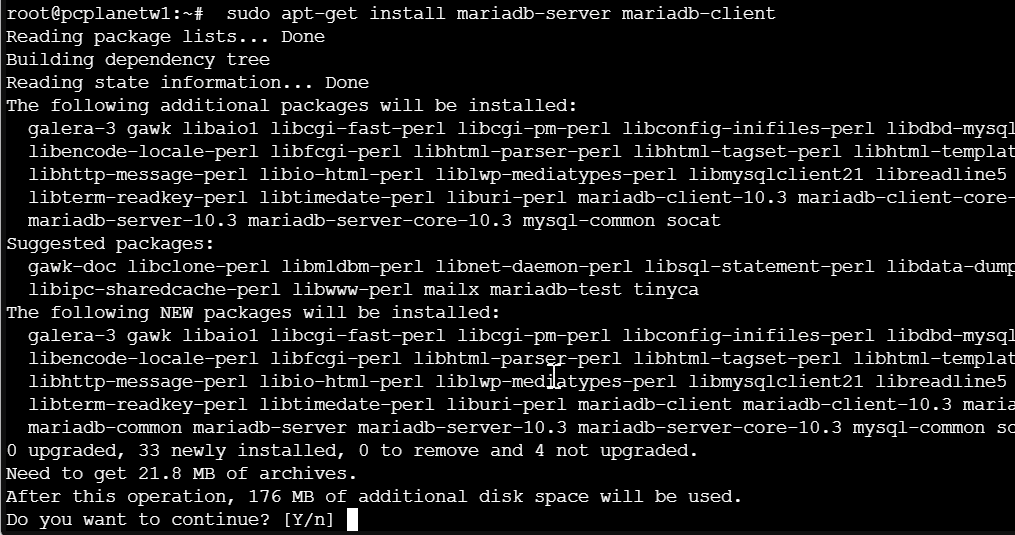
In the event that you would want to install MariaDB, you may do so by using the following command.

 sudo apt-get install mariadb-server mariadb-client
Install MariaDB in Ubuntu

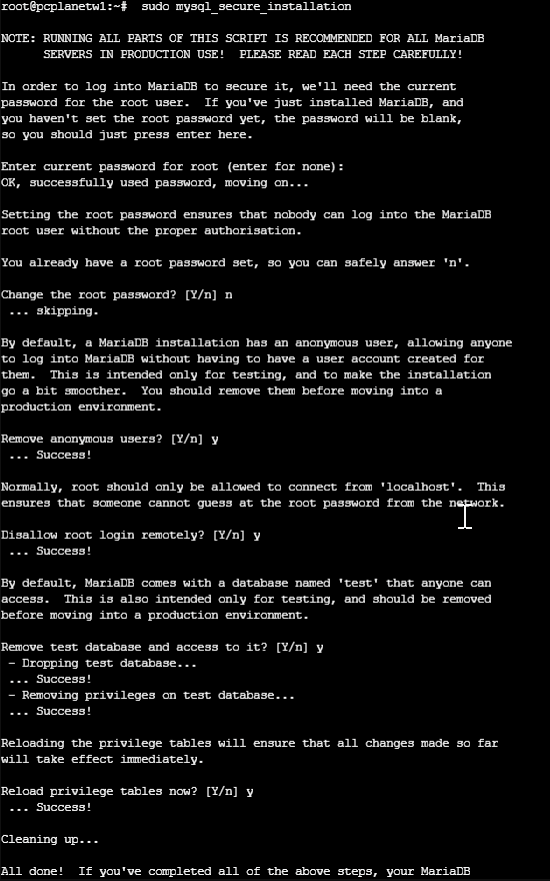
After the database server has been installed, it is highly recommended that you execute the security script to get rid of unsafe default settings and to safeguard your database system.

 sudo mysql_secure_installation

you will be given the option to change the default password

Hit the Y key, and then immediately after that, press the ENTER key for each of the following questions.

Step 3: Install PHP on Ubuntu

Lastly, we will use the command below to install PHP and a few modules in order for it to function properly with the web and database servers:

 sudo apt-get install php libapache2-mod-php php-mysql php-curl php-gd php-mbstring php-xml php-xmlrpc php-soap php-intl php-zip

You must restart Apache in order for the newly installed extensions to take effect once PHP and all essential extensions have been installed.

 sudo systemctl restart apache2

In order to see whether PHP is functioning with the web server, a file named info.php must be created in /var/www/html.

 sudo nano /var/www/html/info.php

And then just save the file when you’ve added the code below to it and close the window.

<?php
phpinfo();
?>

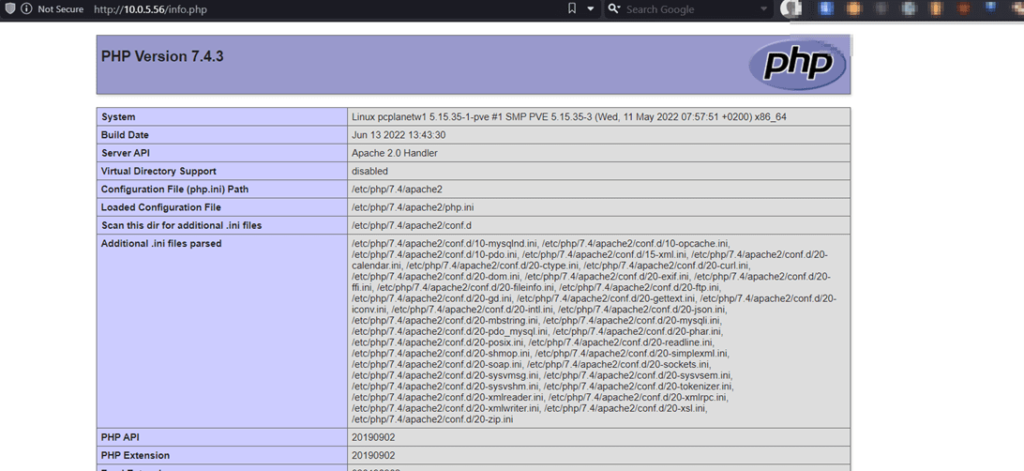
After you have completed that step, open your browser and go to the following URL using the address bar.

http://server_address/info.php
or
http://your-domain.com/info.php

As a confirmation, you should be able to see the php info page below.

Step 4: WordPress installation on Ubuntu

Download the most up-to-date version of the package for WordPress and extract it using the instructions below:

wget -c http://wordpress.org/latest.tar.gz
tar -xzvf latest.tar.gz

next transfer the WordPress files to the Apache default root location, /var/www/html:

 sudo mv wordpress/* /var/www/html/

Set the right permissions on the website’s directory, i.e., grant the webserver ownership of the WordPress files.

sudo chown -R www-data:www-data /var/www/html/
sudo chmod -R 755 /var/www/html/

Step 5: Create a Database for WordPress

Execute the following command and enter the root password, finally press Enter to access the mysql shell:

 sudo mysql -u root -p

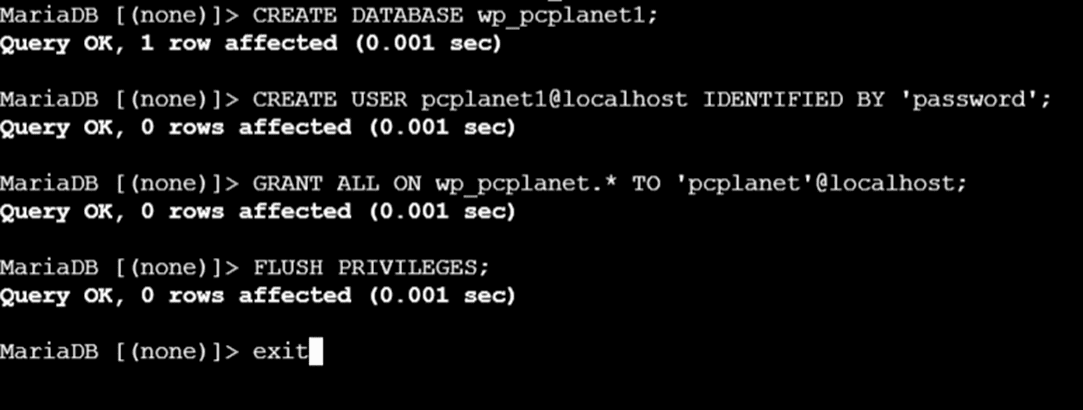
At the mysql prompt, enter the following commands, hitting Enter after each mysql command line. Remember to provide your own valid settings for database name, database user, and databaseuser password:

(DO NOT FORGET THE ; )

mysql> CREATE DATABASE wp_pcplanet;
mysql> CREATE USER pcplanet@localhost IDENTIFIED BY 'password';
mysql> GRANT ALL ON wp_pcplanet.* TO 'username'@'%';
mysql> FLUSH PRIVILEGES;
mysql> EXIT;
BONUS if you can find the problem in the screenshot above

Rename the existing file to file in the /var/www/html/ directory. Additionally, delete the default Apache page.

 cd /var/www/html/
sudo mv wp-config-sample.php wp-config.php
 sudo rm -rf index.html

Then you should modify it so that it contains the information about your database in the MySQL options menu (refer to the boxes that are indicated in the figure below):

After that, be sure to restart the web server in addition to the mysql service by using the following commands:

sudo systemctl restart apache2.service
sudo systemctl restart mysql.service

First, launch your web browser, and then input your domain name or server address in the spaces provided.

http://server_address/info.php
or
http://your-domain.com/info.php

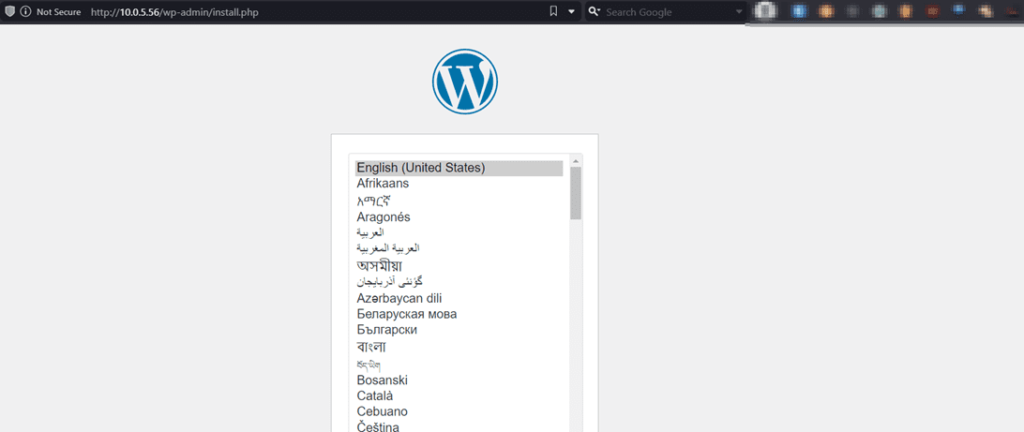
The following welcome page will appear for you to go through. After reading over the page, choose the “Let’s go!” button to continue, and then fill out all of the information that is needed on the screen.

Honestly, this was a lot of work for a simple task – check out this guide for our preferred way of setting apache up!

July 11, 2022 0 comments
0 FacebookTwitterPinterestEmail
Newer Posts
Older Posts

Recent Posts

  • Creating Custom Nginx Rules for Different Subdomains in DirectAdmin
  • Nginx Reverse Proxy for Nextcloud: A Guide
  • How to Reverse Proxy in DirectAdmin with Nginx_Apache
  • How to install Python 3.10 on RHEL
  • How to install Python 3.10 on Ubuntu 20.04

Recent Comments

  1. Daron Buesgens on Introduction to PHP Server-Side Scripting Language
  2. Tim Slosek on How to install Python on CentOS 8
  3. аналитика леонида малолетова on 15,000 WordPress Sites hacked with Malicious Redirects
  4. 076 on Websites Posing as MSI Afterburner That Spread CoinMiner
  • Home
  • Tools
    • CHMOD Calculator
    • Subnet Calculator
  • Linux Guides & Tutorials
    • Beginner Guides
    • Linux Installation Tutorials
    • Command Line Tutorials
    • Server Administration Guides
    • Security Tutorials
    • Database Tutorials
    • Open-Source Software
      • Nextcloud Guides
      • Apache
    • Operating Systems
      • Ubuntu
      • RHEL/Rocky/Alma
  • Ransomware News
  • Cybersecurity Laws and Regulations

Recent Posts

Creating Custom Nginx Rules for Different Subdomains in DirectAdmin
Nginx Reverse Proxy for Nextcloud: A Guide
How to Reverse Proxy in DirectAdmin with Nginx_Apache
How to install Python 3.10 on RHEL

Most Viewed

Best Linux distribution (distros) in 2022
15,000 WordPress Sites hacked with Malicious Redirects
How to Install Python 3.9 on Ubuntu 18.04
6aabc923d85895a8823d81efa5e551d7
PCPlanet – Tech Blogs | Information
  • Home