PCPlanet – Tech Blogs | Information
  • Home
  • Tools
    • CHMOD Calculator
    • Subnet Calculator
  • Linux Guides & Tutorials
    • Beginner Guides
    • Linux Installation Tutorials
    • Command Line Tutorials
    • Server Administration Guides
    • Security Tutorials
    • Database Tutorials
    • Open-Source Software
      • Nextcloud Guides
      • Apache
    • Operating Systems
      • Ubuntu
      • RHEL/Rocky/Alma
  • Ransomware News
  • Cybersecurity Laws and Regulations
Top Posts
How to install Emby Server on Ubuntu
Best Linux distribution (distros) in 2022
15,000 WordPress Sites hacked with Malicious Redirects
How to Install Python 3.9 on Ubuntu 18.04
How to Install Python 3.9 on Ubuntu 16.04
How to Install MongoDB on Ubuntu 16.04 to...
How to install Python on CentOS 8
How to enable HSTS on Apache
How to install PHP 8.1 on RHEL based...
Comment activer HSTS pour Apache
Navigating CVE-2023-49103: Proactive Defense for ownCloud
Friday, May 16, 2025
PCPlanet – Tech Blogs | Information
  • Home
  • Tools
    • CHMOD Calculator
    • Subnet Calculator
  • Linux Guides & Tutorials
    • Beginner Guides
    • Linux Installation Tutorials
    • Command Line Tutorials
    • Server Administration Guides
    • Security Tutorials
    • Database Tutorials
    • Open-Source Software
      • Nextcloud Guides
      • Apache
    • Operating Systems
      • Ubuntu
      • RHEL/Rocky/Alma
  • Ransomware News
  • Cybersecurity Laws and Regulations
Copyright 2021 - All Right Reserved
LinuxUbuntu

How to Install pip for Python3 on Ubuntu 22.04

by pcplanet January 18, 2023
written by pcplanet 4 minutes read

A package manager called Pip is used to install, upgrade, configure, and manage Python dependencies. Using pip, you can search for, download, and install packages from the Python Package Index (PyPI) and other package indexes.

This page has instructions on how to set up pip on Ubuntu 20.04 to 22.04 for both Python 3 and Python 2. Along with that, we will show you how to use pip to install and manage packages.

Prerequisites / More information

Python has two different versions: Python 2 and Python 3. Python 3 is installed with the base system, and Python 2 can be installed from the default repositories in Ubuntu. Python 3 users are urged to use it.

Most of the time, the best way to install a Python module globally is to use the apt tool to install the module’s deb package. This is because deb packages are tested to work well on Ubuntu systems. If there is no deb package for a module, use pip to install it globally.

Packages for Python 3 start with python3-, and packages for Python 2 start with python2-.

You should only use pip inside of a virtual environment. With Python Virtual Environments, you can install Python modules in a separate place for a single project instead of having them installed everywhere. So, you don’t have to worry about how your changes will affect other Python projects.

How to install pip for Python 3

In Ubuntu versions 20.04 through 22.04, installing pip for Python 3 is a breeze. Execute the following in the terminal as the root or sudo user:
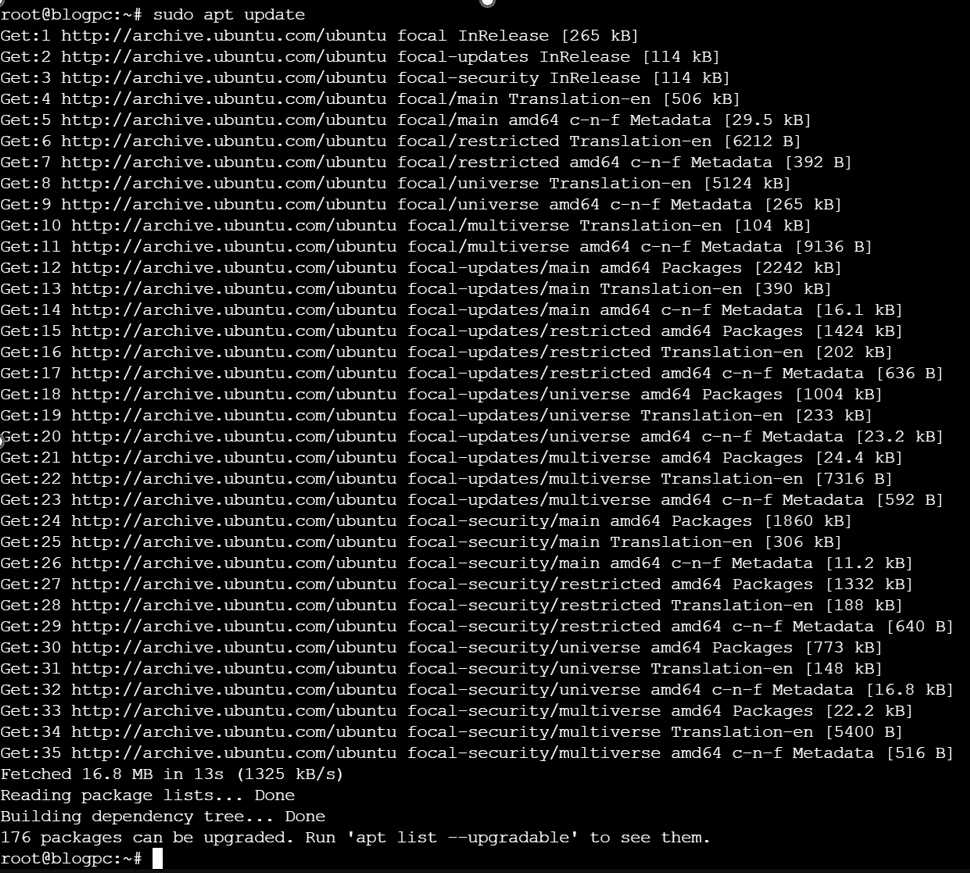
sudo apt update
sudo apt install python3-pip

All the prerequisites for constructing Python modules are also set up using the preceding command.

When everything is set up, double check by looking at the pip version:

pip --version

The version number may vary, but it will look something like this:

pip 22.0.2 from /usr/lib/python3/dist-packages/pip (python 3.10)

How to install pip for Python 2

The Ubuntu 22.04 repositories do not have Pip for Python 2. We’ll use the get-pip.py script to set up pip for Python 2.

If Python 2 is not already on your system, you can install it by running:

sudo apt update
sudo apt install python2

To get the get-pip.py script, use curl:

curl https://bootstrap.pypa.io/pip/2.7/get-pip.py --output get-pip.py

To install pip for Python 2, run the script as the sudo user with the python2 binary:

sudo python2 get-pip.py

Using the above command installs pip everywhere. If you only want it installed for your user, run the command without sudo. The script also installs the setuptools and wheel packages, which let you set up source distributions.

Print the pip version number to verify the installation:

pip2 –V
pip 20.3.4 from /usr/local/lib/python2.7/dist-packages/pip (python 2.7)

How to Use Pip

The following part will teach you the fundamental pip commands you’ll need. Enter the following to see a complete list of pip commands and options:

pip --help

Using pip command> —help, you can learn more about that command. If you want to know more about the install command, for instance, you may type:

Pip install --help

How to install Packages with Pip

The most fundamental use for the pip tool is to do an installation. Suppose you’re interested in setting up NumPy.

This is the command to perform if you want to install a package’s most recent version:

pip install <package_name>

You may type to set up the NumPy package.

pip install numpy

After the package name, append == and the version number to install a specific revision:

pip install numpy==1.18.5

Replace pip with pip2 if using Python 2.

How to install Packages with Pip using the Requirements Files

A Python project’s requirement.txt file specifies the pip packages and their versions that are needed to compile and operate the project.

The following command will install the contents of a file containing a list of prerequisites:

pip install -r requirements.txt

Listing Installed Packages

Use the “list” pip subcommand to see a list of all currently installed packages:

pip list

Upgrade a Package With Pip

To update an existing installation to the most recent version, type:

pip install --upgrade package_name

Uninstalling Packages With Pip

This is the command you need to execute in order to remove a package:

pip uninstall package_name

Conclusion

You now know how to set up pip on Ubuntu and use it to handle Python package management. Visit the pip user guide website for additional details.

Please use the space below to ask questions and offer suggestions..

January 18, 2023 0 comments
1 FacebookTwitterPinterestEmail
LinuxUbuntu

​How to Upgrade to Ubuntu 22.04

by pcplanet January 11, 2023
written by pcplanet 4 minutes read

If you are currently running Ubuntu 20.04 or 21.10, you may follow the steps in this guide to upgrade to Ubuntu 22.04 LTS.

Released on April 21, 2022, Ubuntu 22.04 LTS (Jammy Jellyfish) will get five years of extended maintenance. It includes the newest versions of OpenSSL, GCC, Python, Ruby, and PHP, among many other key software improvements and new packages. Support for new hardware and filesystems have been included into this version, which is based on the Linux 5.15 LTS kernel.

The desktop version includes the latest kernel (5.17), the GNOME 42 desktop environment, and a screenshot and screen recording utility.

Prerequisites

To complete the upgrading process, a user must have administrative access. You need to be logged in as a user with sudo permissions or as root. Ubuntu’s default installation process creates a user with full administrative capabilities.

Ubuntu 20.04 and Ubuntu 21.10 users may immediately update to 22.04.

To access the Internet and download the latest installer, you must have a reliable connection.

Backup data

Before beginning a large update to your operating system, it is imperative that you create backups of all of your data. A full system snapshot (if it’s a VM) is recommended before updating Ubuntu on a virtual machine so that you may immediately recover your computer if anything goes wrong during the upgrade process.

Please note that snapshots on VM hypervisors such as ESXi, Proxmox can keep on growing if not deleted so please be sure to:

  1. Take a snapshot
  2. Apply what is needed in the VM
  3. Remove snapshot after all tests and everything is working

Update Installed Packages

It is suggested that all currently installed packages be upgraded to their most recent versions before beginning the release upgrade.

The apt list should be updated, and any existing packages should be upgraded.

sudo apt update
sudo apt upgrade

After upgrading the kernel, you should log out and back in.

Upgrade your systems software:

sudo apt full-upgrade

If a package no longer requires an outdated kernel, remove it along with all of its automatic dependencies.

sudo apt --purge autoremove

Upgrade to Ubuntu 22.04 LTS (Jammy Jellyfish)

It’s easy to upgrade to the newest version of Ubuntu. Either a command line interface (through do-release-upgrade) or a graphical user interface (via the update tool) are available for performing upgrades.

By using the command line, we can update both desktop and server computers.

The “update-manager-core” package, which includes do-release-upgrade, is pre-installed on most Ubuntu machines.

In the event that it is not already present on your machine, you can get it with:

sudo apt install update-manager-core

To initiate the upgrade, type in:

sudo do-release-upgrade

When you run the do-release-upgrade command, the “jammy” repositories will be added to the apt list, and all other third-party repositories will be turned off. You’ll be asked more than once to confirm that you still want to upgrade. Enter “y” when asked if you want the services to start up again automatically after the upgrade.

During the upgrading process, the command will ask you several questions, such as whether you want to keep your current configuration file or install the version that the package’s author maintains. If you haven’t changed anything in the file, entering Y should be fine. If everything else stays the same, it’s probably best to just leave things alone. Read the questions and make a choice when you’re ready.

The update works in a GNU screen session, and if the connection is lost, it will reconnect right away.

How long it takes to finish the process will depend on how many updates you have and how fast your Internet connection is.

After you install the updated packages, the updater will ask if you want to remove the previous version. If you’re unsure, just hit d to get a list of deprecated packages. This is the safest way to get rid of all deprecated packages.

When the upgrade is done (and if it went well), your computer will ask you to restart it. If you want to go on, press the y key.

System upgrade is complete.

Restart required

To finish the upgrade, a restart is required.
If you select 'y' the system will be restarted.

Continue [yN] y

Confirm the Upgrade

You can use the following command to find out what version of Ubuntu you have:

lsb_release -a
No LSB modules are available.
Distributor ID:	Ubuntu
Description:	Ubuntu 22.04 LTS
Release:	22.04
Codename:	jammy

Conclusion

Ubuntu has the easiest way to update out of all the Linux distributions.

If you have any questions, please feel free to post a remark.

January 11, 2023 0 comments
2 FacebookTwitterPinterestEmail
LinuxUbuntu

How to Install Tmux on Ubuntu 22.04: A Comprehensive Guide

by pcplanet January 4, 2023
written by pcplanet 4 mins read

Tmux, short for Terminal Multiplexer, is a powerful command-line utility that enables you to create and manage multiple terminal sessions within a single window. When you install Tmux on Ubuntu 22.04, you can split your terminal into multiple panes, detach and reattach sessions, and even share sessions with other users. This tool is particularly useful for developers, system administrators, and anyone who works extensively with the command line on Ubuntu systems. Installing Tmux on Ubuntu 22.04 allows you to streamline your workflow and boost productivity by organizing your workspace into multiple windows and panes.

Prerequisites for Installing Tmux on Ubuntu 22.04

Before proceeding with the installation of Tmux on Ubuntu 22.04, ensure you have the following prerequisites in place:

  • A system running Ubuntu 22.04
  • Familiarity with basic terminal commands
  • Administrative privileges (for installation)

Why Use Tmux on Ubuntu 22.04?

There are several compelling reasons why you might want to install Tmux on Ubuntu 22.04:

  • Session Persistence: Tmux allows you to detach from a session and reattach to it later, even if you’ve closed the terminal window or disconnected from the remote server. This means you can pick up right where you left off, without losing your work.
  • Multiple Windows and Panes: With Tmux installed on Ubuntu 22.04, you can create multiple windows and split each window into multiple panes, allowing you to view and work with multiple applications or processes simultaneously.
  • Enhanced Productivity: By organizing your workspace into multiple panes and windows, you can streamline your workflow and increase your productivity. For example, you can have a pane for editing code, another for running tests, and another for monitoring logs.
  • Remote Sessions: Tmux allows you to share sessions with other users, making it easier to collaborate on projects or troubleshoot issues remotely.

Installing Tmux on Ubuntu 22.04: Step-by-Step Guide

Now that you understand the benefits of using Tmux, let’s dive into the installation process on Ubuntu 22.04.

Step 1: Update the Package Index

Before installing any new package on Ubuntu 22.04, it’s always a good practice to update the package index on your system. Open the terminal and run the following command:

Bash
sudo apt update

This command will fetch the latest package information from the Ubuntu repositories.

Step 2: Install Tmux on Ubuntu 22.04

Once the package index is updated, you can proceed with the installation of Tmux on Ubuntu 22.04. Run the following command to install Tmux:

Bash
sudo apt install tmux

The installation process will take a few moments, and you may be prompted to confirm the installation by typing y and pressing Enter.

Step 3: Verify the Installation of Tmux on Ubuntu 22.04

After the installation is complete, you can verify that Tmux has been installed correctly on Ubuntu 22.04 by running the following command:

Bash
tmux -V

This command will display the version of Tmux installed on your system. If the installation was successful, you should see output similar to:

Bash
tmux 3.2a

Getting Started with Tmux on Ubuntu 22.04

Now that you have Tmux installed on Ubuntu 22.04, it’s time to start using it! Here are some essential commands to get you started:

  • tmux: Start a new Tmux session.
  • tmux new -s session_name: Start a new Tmux session with a specific name.
  • tmux ls: List all active Tmux sessions.
  • tmux attach -t session_name: Attach to an existing Tmux session.
  • Ctrl+b d: Detach from the current Tmux session.
  • Ctrl+b ": Split the current pane horizontally.
  • Ctrl+b %: Split the current pane vertically.
  • Ctrl+b q: Show pane numbers.
  • Ctrl+b z: Toggle zoom for the current pane.

To learn more about using Tmux and its advanced features, refer to the official Tmux documentation or check out this comprehensive guide [link to a Tmux guide].

Customizing Tmux on Ubuntu 22.04

While Tmux offers a robust set of features out of the box, you can further customize its behavior and appearance to better suit your preferences. This can be achieved by creating a .tmux.conf configuration file in your home directory. Here’s an example of a basic configuration:

Bash
#Set the prefix key to Ctrl+a

set -g prefix C-a

#Split panes using | and -

bind | split-window -h
bind - split-window -v
unbind '"'
unbind %

#Enable mouse mode

set -g mouse on

#Set the status line

set -g status-bg black
set -g status-fg white```

This configuration sets the prefix key to Ctrl+a, binds new keys for splitting panes vertically and horizontally, enables mouse mode for resizing panes, and customizes the appearance of the status line. You can further customize Tmux by exploring the available options and settings in the official documentation.

FAQ

Q: Can I use Tmux on Windows or macOS?

A: Yes, Tmux is available on various platforms, including Windows (through Windows Subsystem for Linux or third-party tools like Cygwin) and macOS. However, the installation process may differ slightly.

Q: How do I share a Tmux session with others?

A: To share a Tmux session, first create a new session or attach to an existing one. Then, use the tmux new-session -t session_name command to create a new session with the desired name. Finally, share the session name and server details with others, and they can connect to the shared session using the tmux attach -t session_name command.

Q: Can I use Tmux with a graphical user interface (GUI)?

A: While Tmux is primarily a command-line tool, there are third-party tools and plugins that can provide a graphical interface for managing Tmux sessions. However, most users prefer to work with Tmux directly from the terminal.

Conclusion

Installing Tmux on Ubuntu 22.04 is a straightforward process that can significantly enhance your command-line experience. With its ability to manage multiple sessions, windows, and panes, Tmux is an essential tool for developers, system administrators, and power users alike. By following the steps outlined in this blog post, you can easily install Tmux on your Ubuntu 22.04 system and start taking advantage of its powerful features to streamline your workflow and boost your productivity.

January 4, 2023 0 comments
1 FacebookTwitterPinterestEmail
LinuxRHELUbuntu

How to install Redis for Nextcloud

by pcplanet December 28, 2022
written by pcplanet 3 mins read

Redis, which stands for Remote Dictionary Server, is a fast, key-value data store that operates in memory and is free to use. Created by Salvatore Sanfilippo, Redis was initially developed to enhance the scalability of his Italian startup. Today, Redis is a versatile tool used as a database, cache, message broker, and queue.

Why Use Redis with Nextcloud?

Redis is renowned for its impressive response times of less than one millisecond, enabling it to handle millions of requests per second. This makes it an ideal choice for real-time applications in various fields such as gaming, ad-tech, financial services, healthcare, and the Internet of Things (IoT). Its speed and reliability have made Redis one of the most popular open-source engines. For the past five years, it has been named the “Most Loved” database by Stack Overflow.

When integrated with Nextcloud, Redis significantly enhances performance, especially in caching and session management. This optimization is crucial for applications requiring quick data retrieval and processing, such as:

  • Caching: Reduces the load on the primary database by storing frequently accessed data.
  • Session Management: Ensures fast and reliable user session handling.
  • Gaming and Leaderboards: Provides real-time updates and fast data access.
  • Real-time Analytics: Delivers immediate insights from live data.
  • Geospatial Applications: Handles location-based data efficiently.
  • Ride-hailing and Chat/Messaging: Supports high-speed data transactions.
  • Media Streaming: Enhances the performance of streaming services.
  • Pub/Sub Applications: Efficiently manages publish/subscribe messaging patterns.

Installing Redis on Major Linux Distributions

Most major Linux distributions provide packages for Redis, making installation straightforward. Here’s a quick guide to get you started:

Ubuntu/Debian

For those running a minimal distribution, such as a Docker container or an LXC container, there may be a need to install lsb-release first. This package provides essential information about the Linux distribution in use.

  • Machine Used: LXC Container running Ubuntu 20.04

Here’s how you can install lsb-release:

Bash
sudo apt install lsb-release

Note: Installing this package ensures compatibility with various scripts and applications that rely on specific distribution information. It’s particularly useful in containerized environments where such information might not be readily available.

Bash
sudo apt update
sudo apt install redis-server

CentOS/RHEL

Bash
sudo yum install epel-release
sudo yum install redis

Fedora

Bash
sudo dnf install redis
cli display of updating the OS for redis
cli display of redis install

Remote Access

If you’d like to connect applications that are not on the machine, we can do it this way.

Bash
sudo nano /etc/redis/redis.conf

Change bind 127.0.0.1 to bind 0.0.0.0 . Save and exit and then run:

Bash
sudo service redis-server restart

PHP-Redis

You’ll need to install the redis php module on the nextcloud server as well:

Bash
sudo apt install php-redis

Step 2 — Testing Redis for Nextcloud

Prior to making any more changes to Redis’ setup, it’s a good idea to verify that it’s working as intended, as you would with any freshly installed program. We will go through two techniques to confirm that Redis is operating appropriately in this stage.

Start by confirming that the Redis service is operating

Bash
sudo systemctl status redis

If it is running without any errors, this command will produce output similar to the following:

Connect to the server using redis-cli, the command-line client for Redis, to verify that it is operating properly:

Bash
redis-cli

Should be more than enough for testing its connectivity.

Step 3 – Connect Redis to Nextcloud

Local Redis

At this point we know Redis is functional and ready to be implement into our Nextcloud instance. Head to your Nextcloud config folder, edit the config.php and add these lines:

PHP
'memcache.local' => '\\OC\\Memcache\\Redis',
'memcache.distributed' => '\\OC\\Memcache\\Redis',
'filelocking.enabled' => 'true',
'memcache.locking' => '\\OC\\Memcache\\Redis',
'redis' =>
array (
'host' => 'localhost',
'port' => 6379,
'timeout' => 0.0,
),

Remote Redis server

If you want to use a remote Redis server you need to set the Ip or FQDN of the Redis machine in the ‘host’ parameter:

PHP
'memcache.local' => '\\OC\\Memcache\\Redis',
'memcache.distributed' => '\\OC\\Memcache\\Redis',
'filelocking.enabled' => 'true',
'memcache.locking' => '\\OC\\Memcache\\Redis',
'redis' =>
array (
'host' => 'CHANGEME',
'port' => 6379,
'timeout' => 0.0,
),

Conclusion

That’s it, your Nextcloud instance should automatically start using Redis for memory caching and help prevent deadlocks.

Optimizing Redis for Nextcloud

After successfully installing Redis and connecting it to your Nextcloud instance, you can further enhance performance by applying various optimization techniques. Below are some essential tips and tuning suggestions to help you make the most out of Redis with Nextcloud.

1. Tuning Redis Configuration

Redis’s performance can be optimized by adjusting its configuration file (/etc/redis/redis.conf). Here are some key settings to consider:

Max Memory

Set a limit on how much memory Redis can use based on your system’s available resources. This prevents Redis from consuming all available system memory and ensures stable performance.

Markdown
maxmemory 256mb
maxmemory-policy allkeys-lru

Persistence Options

Depending on your requirements, you can enable or disable persistence to improve performance. If data persistence is not critical, disabling it can free up I/O resources.

Markdown
appendonly no

TCP Keepalive

Set an appropriate value for TCP keepalive to ensure a more reliable connection.

Markdown
tcp-keepalive 300

2. Monitoring Redis Performance

To maintain optimal performance, it’s crucial to monitor Redis’s behavior and resource usage. Redis provides several tools for this purpose:

Monitoring Commands

Use the redis-cli monitor command to observe all the commands processed by the server in real-time. This helps in identifying any performance bottlenecks.

Markdown
redis-cli monitor

Benchmarking

Run the redis-benchmark tool to test how many requests per second your Redis server can handle. This provides a clear picture of your Redis instance’s performance capabilities.

Markdown
redis-benchmark

3. Securing Redis

If your Redis instance is exposed to the WAN network (e.g., binding to 0.0.0.0 and 1:1 or port forwarding), implementing security measures is crucial to prevent unauthorized access:

Set a Strong Password

Configure a strong password in the Redis configuration file to protect your instance from unauthorized access.

requirepass your-strong-password

Use Firewall Rules

Ensure that only trusted IP addresses can connect to your Redis port (usually 6379). This can be achieved by configuring your firewall rules accordingly.

For more in-depth instructions and advanced configurations, refer to the official Redis documentation and Nextcloud documentation.

December 28, 2022 0 comments
0 FacebookTwitterPinterestEmail
LinuxUbuntu

How to Install Nano on Ubuntu 22.04

by pcplanet December 21, 2022
written by pcplanet 4 mins read

Those who have used Linux before will know that the terminal is the hub of the system. Use it to do anything you can imagine, including managing your entire system, browsing your filesystem, keeping tabs on your network, and writing text files. In other words, the terminal is your oyster in terms of what you can accomplish and nano can help. When you’re in the thick of things, it can be counterproductive to constantly switch between programs. The terminal is the best place to work with text or configuration files.

The learning curve for Vim and Emacs, two powerful Ubuntu command-line editors, is steep. Some new users may feel overwhelmed when exploring learning resources. Nano is designed for them. A simple Linux command-line editor. Let’s show you how to use and install nano on Ubuntu.

Prerequisites

  • Ubuntu server 18.04 or 20.04 or 22.04
  • Root access

Verifying whether it is already installed

Nano, like many other distributions, is available as part of Ubuntu’s default installation with the option to download and install updates at the time of setup. If you’re using Ubuntu 22.04 and want to check if nano is installed, you can do so with this command.

nano –version

Let’s begin setting up nano right now.

Updating the apt repositories

If you run this, any conflicts with dependencies will be resolved, and the installation will proceed without a hitch.

sudo apt update

After that, you’re ready to begin the installation with “apt.”

Install Nano

To initiate the installation, enter this command into the terminal.

sudo apt install nano

If you get the prompt again after installation is finished, that means everything went smoothly.

Launching Nano

After nano has been installed, you can run it by typing its name into the terminal.

nano

When you hit “Return,” nano will start up and create a new file.

At the terminal’s window’s bottom, you’ll find a few convenient quick-access buttons. As it’s been around for longer than many of the computing conventions, you’ll see that the shortcuts for copy and paste are very different. Presently, a new document is being displayed in this panel. We can immediately begin making changes to the document.

Open a file

You can use the nano command to open a file in the nano editor by either starting the terminal in the directory containing the file or navigating to the desired directory. Since we gave the file the descriptive name “test file,” we can access it in this way:

nano ‘test file’

If you want to edit the file in the nano editor, type the following command and press return.

Editing the files

As opposed to vi and vim, nano does not have a mode switch. Any file can be opened and edited without any additional preparation.

To move the cursor to a specific line or character number, press “Ctrl+_.” When you click this, the bottom options will shift and a prompt reading “Enter line number, column number” will appear.

Copying, cutting, and pasting within the files

The heading functions require that you first select some text to work on. To select all of a piece of text, place the cursor at the beginning of the passage and hit the “Alt+a” key combination. To the beginning, a checkbox will be added. Follow the directions below to get to the final section of this article. The third line should be copied:

Pressing “Alt+6” will now copy the text without selecting it. After copying the text, press “Ctrl+U” to paste it where you want it to appear.

Just like with “Ctrl+J,” “Ctrl+K,” and “Ctrl+U,” you can copy and paste the text you want.

Running a spellcheck

In contrast to Microsoft Word, not all features are included in the default download. A spellchecker package must be installed before you can use it to check your paper. To set up the spell checker, just run this:

sudo apt install spell

Then, all you have to do is open a text document, press “Ctrl+T” to launch a command session, and “Ctrl+S” to run a spellcheck.

More information

Nano’s documentation is available via the “Ctrl+G” shortcut in Ubuntu 22.04.

You can explore its many features and functions and learn how to use them more effectively by using the links at the bottom of the page.

Uninstalling Nano

If you’ve had enough of nano and want to uninstall it from Ubuntu 22.04, run the command.

sudo apt autoremove nano

This will begin the process of uninstalling nano and all of its prerequisites.

Conclusion

If you’ve been following along, you should now know how to install nano, how to use nano, and how to uninstall nano. Please leave a comment if you have any trouble with the installation or removal process.

December 21, 2022 0 comments
0 FacebookTwitterPinterestEmail
LinuxRHEL

How to Add and Delete Users on CentOS/Rocky Linux

by pcplanet December 14, 2022
written by pcplanet 3 mins read

Provisioning a Linux server entails a number of steps, the first of which is managing user accounts. Different users can have access to unique settings and permissions for a wide range of command-line and graphical user interface (GUI) programs.

How to add users and delete users in CentOS 8/Rocky Linux is covered in this article.

Prerequisites

  • Root User
  • RPM based OS

How To Add Users in CentOS 8/Rocky Linux

Using the useradd command and the desired username, you can set up a new user account in CentOS.

To create a new user account with the name “pcplanet,” for instance, you would type:

sudo adduser pcplanet

When the command is executed successfully, it does not generate any results. It makes a new user and their home directory (/home/pcplanet), and it copies files from the /etc/skel directory into their new directory. The user has complete control over the files and folders contained in their home directory.

There is no need to preface your commands with sudo if you are already logged in as root.

Set a password for the new user so they can access their account. To do so, type passwd followed by the user’s password in a terminal:

sudo passwd pcplanet

Password entry and confirmation will be required.

Changing password for user pcplanet.
New password:
Retype new password:
passwd: all authentication tokens updated successfully.

Use a lengthy password that includes both upper- and lowercase letters, numbers, and symbols.

Granting Sudo Privileges

On CentOS, the wheel group is automatically given sudo privileges.

Add the new user to the group if you want them to have admin privileges:

sudo usermod -aG wheel pcplanet

The sudoers file is also where you can set up which users have sudo privileges.

How To Delete Users in CentOS/Rocky

The userdel command, followed by the user’s name, deletes the user’s account.

To delete the pcplanet user account, for instance, you would type:

sudo userdel pcplanet

When the command is executed successfully, it does not generate any results.

When you use the command above, the user will be deleted without any of their files being destroyed. This also means that the user will no longer be a part of any groups to which it previously belonged.

Use the -r option with userdel to permanently delete a user’s home directory and mail spool.

sudo userdel -r pcplanet

Conclusion

Here, we’ve demonstrated how to add users and delete users in CentOS 8/Rocky Linux. Those instructions also work for any other flavor of Linux.

CentOS, like other Linux distributions, is designed for use by a number of different people simultaneously. One of the most fundamental abilities for any Linux user to have is the ability to add users and delete users.

If you have any questions, you can always leave a comment below.

December 14, 2022 0 comments
1 FacebookTwitterPinterestEmail
LinuxUbuntu

How to Install Python 3.9 on Ubuntu 20.04

by pcplanet December 2, 2022
written by pcplanet 3 mins read

We’ll show you how to install python 3.9 on ubuntu! To get Python 3.9 running on Ubuntu LTS, you can choose one of two routes. Either download Python 3.9 from the deadsnakes PPA or compile it from scratch.


Python is a widely used programming language. There is no denying this. From the simplest of programs to the most complex machine learning algorithms, all are possible in this language. Python’s clear and logical grammar has made it a popular choice among programmers of all skill levels.

Downloads of Python 3.9, the most recent significant update to the Python programming language, are now available. A few examples of the many new features include new dict operators, str functions, and support for the IANA time zone. There have also been several more enhancements.


The installation process for Ubuntu is same across all variants based on Ubuntu, including Kubuntu, Linux Mint, and Elementary OS.

How to install Python 3.9 Using Apt on Ubuntu 20.04

This is an easy and quick way to install python 3.9 installed on Ubuntu using the apt package manager.

Install the requirements and the current set of packages:

sudo apt update
sudo apt install software-properties-common

Add the deadsnakes PPA to the sources list of your system:

sudo add-apt-repository ppa:deadsnakes/ppa

To proceed, you must hit [Enter] when instructed to do so.

Once the repository has been activated, you will be able to install Python 3.9 by issuing the following command:

sudo apt install python3.9

Type in the following to check that the installation was completed successfully:

python3.9 --version
Python 3.9.1+

That sums it up well. Python 3.9 is now ready for use on your Ubuntu system and has been successfully installed.

How to install Python 3.9 using the source code on Ubuntu 20.04

Compiling Python from its source code gives you the ability to install the most recent version of Python as well as tweak the build parameters. On the other hand, you won’t be able to use the apt package manager to manage and update your Python installation.

The compilation of Python 3.9 from its source code may be broken down into the following steps:

Install the prerequisites for building Python, which are as follows:

sudo apt update
sudo apt install build-essential zlib1g-dev libncurses5-dev libgdbm-dev libnss3-dev libssl-dev libreadline-dev libffi-dev libsqlite3-dev wget libbz2-dev

Using wget, get the source code for the most recent version of Python from the Python download page:

wget https://www.python.org/ftp/python/3.9.1/Python-3.9.1.tgz

When the download is finished, you may extract the gzipped archive as follows:

tar -xf Python-3.9.1.tgz

Move to the directory containing the Python source code, and then execute the configure script. This script will carry out a series of tests to ensure that all of the necessary dependencies are available on your system.

cd Python-3.9.1./configure --enable-optimizations

The --enable-optimizations option optimizes the Python binary by running multiple tests. This makes the build process slower.

Kick off the process of building Python 3.9:

make -j 12

Change the -j option to match to the number of cores in your CPU to make the building process go more quickly. Simply enter nproc into your search bar to get the number..

Once the Python binaries have been built, use the following command to install them into your system.

sudo make altinstall

Because we’ll be overwriting the system’s default python3 binary later, we’re using altinstall rather than install.

That’s all. Python 3.9 is now installed and ready for usage. To confirm, type:

python3.9 --version

The following Python version should be shown in the output:

Python 3.9.1

Conclusion

Python 3.9 is not included in the normal Ubuntu 18.04 repository.

We’ve taught you how to install Python 3.9 on your Ubuntu computer. You may now start building your Python 3.9 project.

Let us know what you think in the comments section below..

December 2, 2022 0 comments
0 FacebookTwitterPinterestEmail
LinuxUbuntu

How to Install Python 3.9 on Ubuntu 18.04

by pcplanet December 2, 2022
written by pcplanet 3 mins read

We’ll show you how to install python 3.9 on ubuntu! To get Python 3.9 running on Ubuntu LTS, you can choose one of two routes. Either download Python 3.9 from the deadsnakes PPA or compile it from scratch.


Python is a widely used programming language. There is no denying this. From the simplest of programs to the most complex machine learning algorithms, all are possible in this language. Python’s clear and logical grammar has made it a popular choice among programmers of all skill levels.

Downloads of Python 3.9, the most recent significant update to the Python programming language, are now available. A few examples of the many new features include new dict operators, str functions, and support for the IANA time zone. There have also been several more enhancements.


The installation process for Ubuntu is same across all variants based on Ubuntu, including Kubuntu, Linux Mint, and Elementary OS.

How to install Python 3.9 Using Apt on Ubuntu 18.04

This is an easy and quick way to install python 3.9 installed on Ubuntu using the apt package manager.

  1. Install the requirements and the current set of packages:
sudo apt update
sudo apt install software-properties-common

Add the deadsnakes PPA to the sources list of your system:

sudo add-apt-repository ppa:deadsnakes/ppa

To proceed, you must hit [Enter] when instructed to do so.

Once the repository has been activated, you will be able to install Python 3.9 by issuing the following command:

sudo apt install python3.9

Type in the following to check that the installation was completed successfully:

python3.9 --version
Python 3.9.1+

That sums it up well. Python 3.9 is now ready for use on your Ubuntu system and has been successfully installed.

How to install Python 3.9 using the source code on Ubuntu 18.04

Compiling Python from its source code gives you the ability to install the most recent version of Python as well as tweak the build parameters. On the other hand, you won’t be able to use the apt package manager to manage and update your Python installation.

The compilation of Python 3.9 from its source code may be broken down into the following steps:

Install the prerequisites for building Python, which are as follows:

sudo apt update
sudo apt install build-essential zlib1g-dev libncurses5-dev libgdbm-dev libnss3-dev libssl-dev libreadline-dev libffi-dev libsqlite3-dev wget libbz2-dev

Using wget, get the source code for the most recent version of Python from the Python download page:

wget https://www.python.org/ftp/python/3.9.1/Python-3.9.1.tgz

When the download is finished, you may extract the gzipped archive as follows:

tar -xf Python-3.9.1.tgz

Move to the directory containing the Python source code, and then execute the configure script. This script will carry out a series of tests to ensure that all of the necessary dependencies are available on your system.

cd Python-3.9.1./configure --enable-optimizations

The --enable-optimizations option optimizes the Python binary by running multiple tests. This makes the build process slower.

Kick off the process of building Python 3.9:

make -j 12

Change the -j option to match to the number of cores in your CPU to make the building process go more quickly. Simply enter nproc into your search bar to get the number..

Once the Python binaries have been built, use the following command to install them into your system.

sudo make altinstall

Because we’ll be overwriting the system’s default python3 binary later, we’re using altinstall rather than install.

That’s all. Python 3.9 is now installed and ready for usage. To confirm, type:

python3.9 --version

The following Python version should be shown in the output:

Python 3.9.1

Conclusion

Python 3.9 is not included in the normal Ubuntu 18.04 repository.

We’ve taught you how to install Python 3.9 on your Ubuntu computer. You may now start building your Python 3.9 project.

Let us know what you think in the comments section below..

December 2, 2022 0 comments
3 FacebookTwitterPinterestEmail
LinuxUbuntu

How to Install Python 3.9 on Ubuntu 16.04

by pcplanet December 2, 2022
written by pcplanet 3 mins read

We’ll show you how to install python 3.9 on ubuntu! To get Python 3.9 running on Ubuntu LTS, you can choose one of two routes. Either download Python 3.9 from the deadsnakes PPA or compile it from scratch.


Python is a widely used programming language. There is no denying this. From the simplest of programs to the most complex machine learning algorithms, all are possible in this language. Python’s clear and logical grammar has made it a popular choice among programmers of all skill levels.

Downloads of Python 3.9, the most recent significant update to the Python programming language, are now available. A few examples of the many new features include new dict operators, str functions, and support for the IANA time zone. There have also been several more enhancements.


The installation process for Ubuntu is same across all variants based on Ubuntu, including Kubuntu, Linux Mint, and Elementary OS.

How to install Python 3.9 Using Apt on Ubuntu 16.04

This is an easy and quick way to install python 3.9 installed on Ubuntu using the apt package manager.

  1. Install the requirements and the current set of packages:
Bash
sudo apt update
Bash
sudo apt install software-properties-common

Add the deadsnakes PPA to the sources list of your system:

Bash
sudo add-apt-repository ppa:deadsnakes/ppa

To proceed, you must hit [Enter] when instructed to do so.

Once the repository has been activated, you will be able to install Python 3.9 by issuing the following command:

Bash
sudo apt install python3.9

Type in the following to check that the installation was completed successfully:

Bash
python3.9 --version
Bash
Python 3.9.1+

That sums it up well. Python 3.9 is now ready for use on your Ubuntu system and has been successfully installed.

How to install Python 3.9 using the source code on Ubuntu 16.04

Compiling Python from its source code gives you the ability to install the most recent version of Python as well as tweak the build parameters. On the other hand, you won’t be able to use the apt package manager to manage and update your Python installation.

The compilation of Python 3.9 from its source code may be broken down into the following steps:

Install the prerequisites for building Python, which are as follows:

Bash
sudo apt update
Bash
sudo apt install build-essential zlib1g-dev libncurses5-dev libgdbm-dev libnss3-dev libssl-dev libreadline-dev libffi-dev libsqlite3-dev wget libbz2-dev

Using wget, get the source code for the most recent version of Python from the Python download page:

Bash
wget https://www.python.org/ftp/python/3.9.1/Python-3.9.1.tgz

When the download is finished, you may extract the gzipped archive as follows:

Bash
tar -xf Python-3.9.1.tgz

Move to the directory containing the Python source code, and then execute the configure script. This script will carry out a series of tests to ensure that all of the necessary dependencies are available on your system.

Bash
cd Python-3.9.1./configure --enable-optimizations

The --enable-optimizations option optimizes the Python binary by running multiple tests. This makes the build process slower.

Kick off the process of building Python 3.9:

Bash
make -j 12

Change the -j option to match to the number of cores in your CPU to make the building process go more quickly. Simply enter nproc into your search bar to get the number..

Once the Python binaries have been built, use the following command to install them into your system.

Bash
sudo make altinstall

Because we’ll be overwriting the system’s default python3 binary later, we’re using altinstall rather than install.

That’s all. Python 3.9 is now installed and ready for usage. To confirm, type:

Bash
python3.9 --version

The following Python version should be shown in the output:

Bash
Python 3.9.1

Conclusion

Python 3.9 is not included in the normal Ubuntu 16.04 repository.

We’ve taught you how to install Python 3.9 on your Ubuntu computer. You may now start building your Python 3.9 project.

Let us know what you think in the comments section below..

December 2, 2022 0 comments
0 FacebookTwitterPinterestEmail
News

Websites Posing as MSI Afterburner That Spread CoinMiner

by pcplanet November 30, 2022
written by pcplanet 4 mins read

Introduction

Software like MSI Afterburner helps gamers and other users of high-performance computing. It keeps track of the system’s performance and lets users fine-tune the hardware settings for the most speed and responsiveness. Threat Actors (TAs) use malware attacks that mostly target these programs.

Cyble Research & Intelligence Labs (CRIL) found new phishing campaigns that target MSI Afterburner. TAs behind these campaigns made phishing pages that look like the official MSI Afterburner website. The TA ran a phishing website to spread coin-mining malware in MSI Afterburner installers.

Mining crypto takes time, energy, and resources. It requires GPUs. TAs can use a victim’s computer’s processing power to mine cryptocurrencies by bundling a coin-miner with Afterburner and installing it on their machine. Below is a TA’s phishing website.

https://blog.cyble.com/2022/11/23/fake-msi-afterburner-sites-delivering-coin-miner/

How does the fake MSI Afterburner work?

Four separate executables, including “MSIAfterburnerSetup465Beta2.exe,” “install.exe,” a cabinet file called “comp.cab” that contains “redline stealer,” and “browser assistant.exe,” which loads XMR Miner, are included in the “MSIAfterburnerSetup.msi” installer file.

The installation wizard is displayed when the MSIAfterburnerSetup.msi file is run, and the user is walked through the steps necessary to set up the software.

The installer discreetly copies a file called “browser assistant.exe” to the Program Files folder and launches it. When run, “the browser assistant.exe” loads a shellcode that downloads the encoded XMR Miner binary from a GitHub repository and injects it into explore.exe.

https://blog.cyble.com/2022/11/23/fake-msi-afterburner-sites-delivering-coin-miner/

By injecting malicious code into a running process, the malware secretly sets up XMR Miner without saving the actual payload to disk.

While doing so, the malware sends the victim’s system’s name, username, GPU, CPU, and other details to the below C&C (Command and Control) server API.

  • hxxp[:]//45[.]87[.]0[.]89/api/endpoint[.]php

The below figure shows exfiltrated sensitive details from the victim’s machine.

https://blog.cyble.com/2022/11/23/fake-msi-afterburner-sites-delivering-coin-miner/

How do I know I’m Compromised by the fake MSI Afterburner?

Here ‘s a table found at Cyble

IndicatorsIndicator
Type
Description
96a3469891a23e0aa49fd009979b668b
a9205e91e5694bb60efe73892bf14652e065bf67
2279b8cf7a2b1fa13f1832b4dc0331bd9f971240f38b0fbd
694ed6aec093bb8d
MD5
SHA1
SHA256
MSIAfterburnerSetup.msi
a9e09703d13de2fd20ca8aab4e02e7c8
a785b651aa699ba651e9fccd94f86fefff88cc6a
00e154eed00b71c0d11bd2caeb64fa2efcbb10524b797c0
76895752affa0f46c
MD5
SHA1
SHA256
browser_assistant.exe
git[.]git[.]skblxin[.]matrizauto[.]net
git[.]git[.]git[.]skblxin[.]matrizauto[.]net
git[.]git[.]git[.]git[.]skblxin[.]matrizauto[.]net
www[.]matrizauto[.]net
DomainDownload Link
hxxp://45[.]87[.]0[.]89/api/endpoint[.]phpURLContacted URL
104[.]20[.]67[.]143IPContacted IP
https://blog.cyble.com/2022/11/23/fake-msi-afterburner-sites-delivering-coin-miner/

Recommendations

  • Users should routinely monitor their computers’ performance and CPU utilization.
  • Businesses should take measures to stop their employees from using Warez and Torrent sites to illegally download software. Malware of this sort can be found in the “Hack Tool” that can be found on various websites like Torrent sites, YouTube, etc.
  • Adding a prohibition on the use of end-user systems to download and install crypto mining software is a necessary update to most organizations’ information security policies and acceptable usage policies.
  • To ensure that users always have the most up-to-date software on their desktop, mobile, and other devices, they should enable automatic updates.
  • PCs, laptops, and mobile devices should all be protected by a reliable antivirus and internet security suite.
  • Users should be taught as part of ongoing security training to avoid clicking on unfamiliar links and opening unfamiliar attachments in emails without first verifying their authenticity.
  • Instruct workers on how to avoid security risks like phishing and visiting suspicious websites.
  • Unexpected spikes in CPU and RAM utilization on endpoints and servers should be monitored for signs of a possible malware infection.

Conclusion

Malware is being actively spread via fake MSI Afterburner websites as part of an ongoing campaign to exploit gamers and other users of high-end computers for cryptocurrency mining. Threat actors (TAs) use a wide variety of methods, such as phishing emails, online advertisements, and other channels, to spread their malicious links. Malware could also be disseminated through TAs if they were used to infiltrate other specialized programs.

After installation, Afterburner will unleash the XMR miner, and it will start mining invisibly using the victim’s CPU and RAM to generate money for the attackers. Deterioration in system performance and exhaustion of the victim’s resources are the result. The efficiency of the victim (either as an individual or a group) is severely reduced.

November 30, 2022 1 comment
1 FacebookTwitterPinterestEmail
Newer Posts
Older Posts

Recent Posts

  • Creating Custom Nginx Rules for Different Subdomains in DirectAdmin
  • Nginx Reverse Proxy for Nextcloud: A Guide
  • How to Reverse Proxy in DirectAdmin with Nginx_Apache
  • How to install Python 3.10 on RHEL
  • How to install Python 3.10 on Ubuntu 20.04

Recent Comments

  1. Daron Buesgens on Introduction to PHP Server-Side Scripting Language
  2. Tim Slosek on How to install Python on CentOS 8
  3. аналитика леонида малолетова on 15,000 WordPress Sites hacked with Malicious Redirects
  4. 076 on Websites Posing as MSI Afterburner That Spread CoinMiner
  • Home
  • Tools
    • CHMOD Calculator
    • Subnet Calculator
  • Linux Guides & Tutorials
    • Beginner Guides
    • Linux Installation Tutorials
    • Command Line Tutorials
    • Server Administration Guides
    • Security Tutorials
    • Database Tutorials
    • Open-Source Software
      • Nextcloud Guides
      • Apache
    • Operating Systems
      • Ubuntu
      • RHEL/Rocky/Alma
  • Ransomware News
  • Cybersecurity Laws and Regulations

Recent Posts

Creating Custom Nginx Rules for Different Subdomains in DirectAdmin
Nginx Reverse Proxy for Nextcloud: A Guide
How to Reverse Proxy in DirectAdmin with Nginx_Apache
How to install Python 3.10 on RHEL

Most Viewed

Best Linux distribution (distros) in 2022
15,000 WordPress Sites hacked with Malicious Redirects
How to Install Python 3.9 on Ubuntu 18.04
6aabc923d85895a8823d81efa5e551d7
PCPlanet – Tech Blogs | Information
  • Home